When I first started my interior decorating business, I offered a free half hour ‘meet and greet’ with potential clients. I would go to their home to see if we were a good fit for working together. This would also provide me with the opportunity to have a look around their home, to see if I could start getting some ideas and if it was even a project that I thought I would like to do.
That business process, in the beginning, worked out really well for me. However, it didn’t take long to realize that often, once people have you in their home, they want to start asking you questions & seek free advice.
If you are going to offer a free home visit, this is what I recommend.
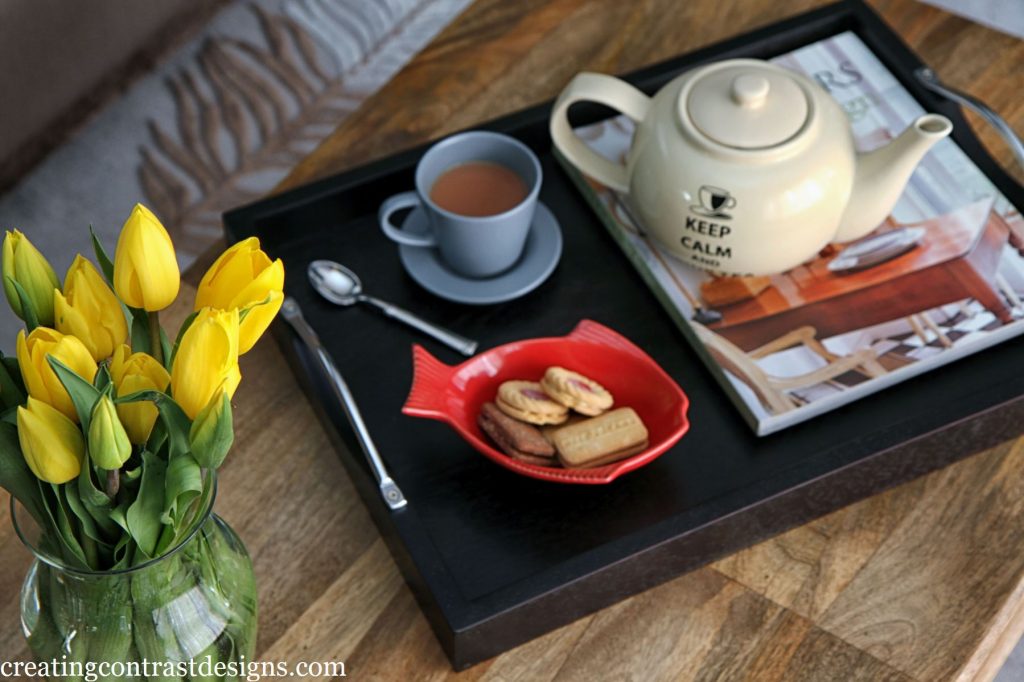
1) Don’t accept the offer of a tea or coffee because you will be there for longer than you anticipated. It’s important for people to realise that your time is valuable and that while you’ve come out to meet & see their space, you don’t have all day to ‘chat’.
2) I actually recommend you meet offsite and not at the clients’ home. Although I don’t really do many of these ‘meet and greets’ often, if I do agree to meet someone to discuss their project, I suggest we have a 15-20 minute meeting at a coffee place.
The important element to remember, no matter what, is that you have to do what works best for you at the point in which you’re at in your business.
For me, this type of meet and greet in the beginning was really great. Why? Well, I felt no pressure and I wasn’t committed either way to the project or the client. However, what you have to be realistic about, is that (for the majority of the time in these instances) these types of people probably aren’t going to be the best clients.
The reason for this is because they are likely expecting you to offer free advice and suggestions for their space. Also, if you come out at no charge, even though they may just not understand the process of working with an interior design professional, they may not be very respectful of your time, expertise and the value you bring to a project.
Once I had a few projects under my belt and in my portfolio, I felt more confident and stopped offering these half hour free ‘meet and greet’ appointments. It’s also helpful when you know what questions to ask on the discovery call to ensure you can hone in on your ideal client.
When you are ready and feeling confident, I even recommend charging more for the initial consultation than your regular hourly design service fee.
Yes, you heard me correctly!
There are two reasons for this: 1) I never hold back at the initial consultation meeting. I bring my bag full of goodies and give as much value as possible (Click here to see ‘What’s in my bag’ that I take to the initial consultation meeting.)
2) I want to book clients who truly value my service and are looking to make an investment in their home & work with someone who has built a brand with professional photos, processes and offers award winning customer service.
Another way of working the initial consultation fee, is some designers charge for the fee for the initial appointment and if the homeowners then decide to move forward from there and retain further services, the designer applies the fee for the consultation against design services –thus making the consultation meeting essentially free.
I don’t have that any experience with that process, but I believe that the reasoning behind that is to get a foot in the door & as an incentive to purchase design services.
Finally, to share with you a completely different strategy, some elite, luxury and more high end design firms, do not charge for the initial meeting because THEY are interviewing the client. These designers tend to want to see the space and speak with the client about their scope and investment amount to ensure they are looking to spend a minimum amount of money for their custom project. That’s a nice place to be, eh?!
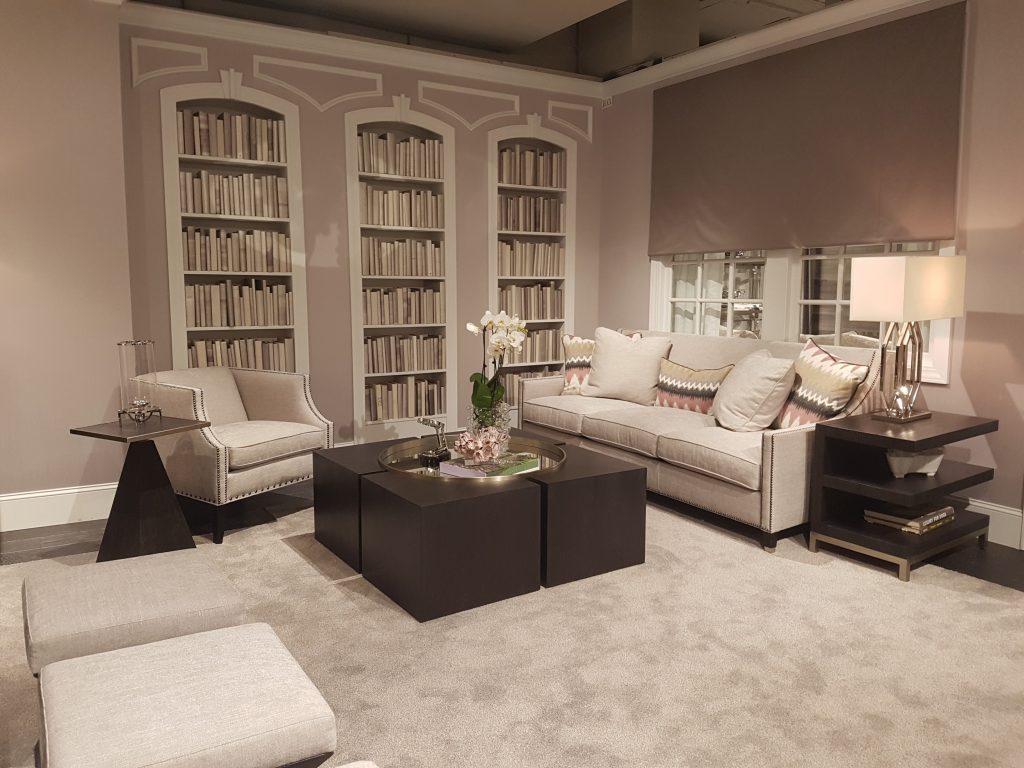
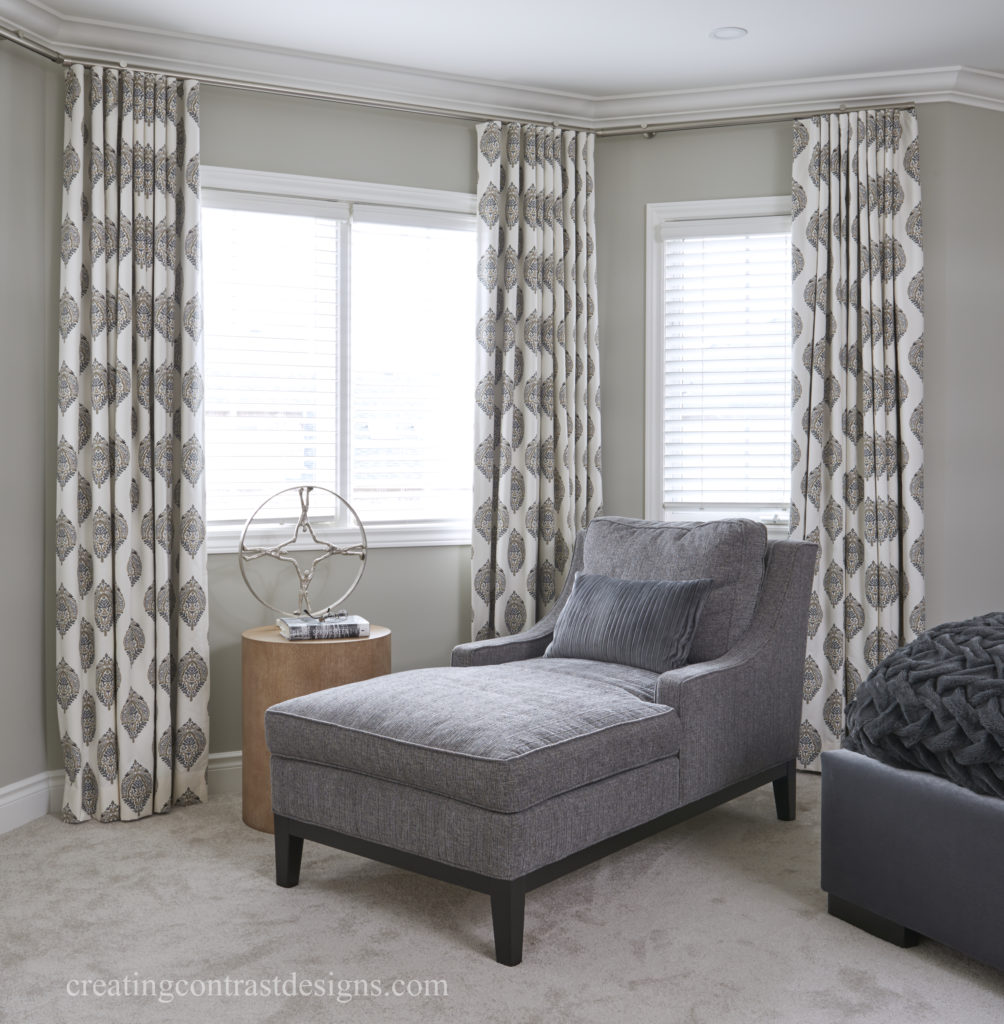
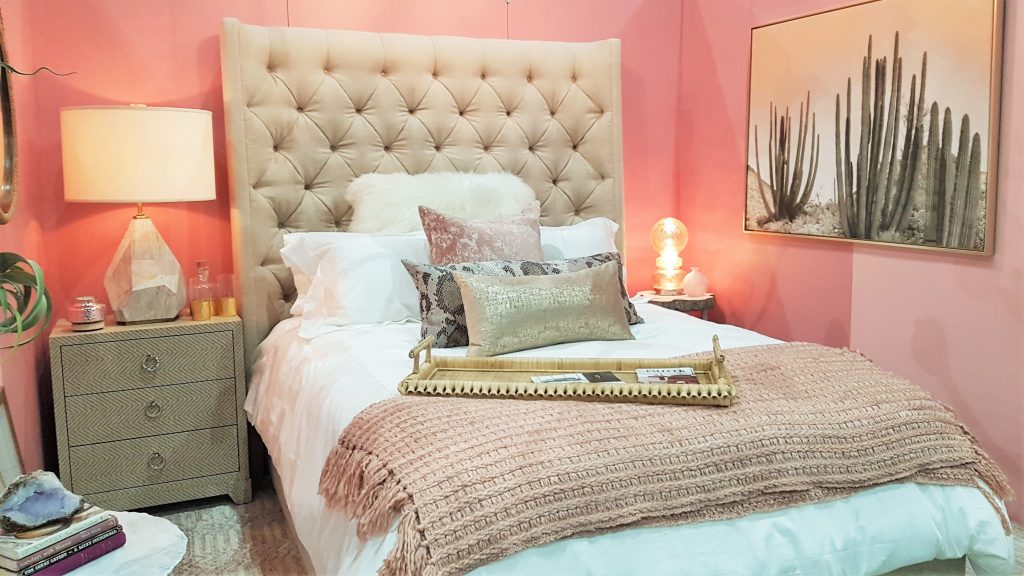
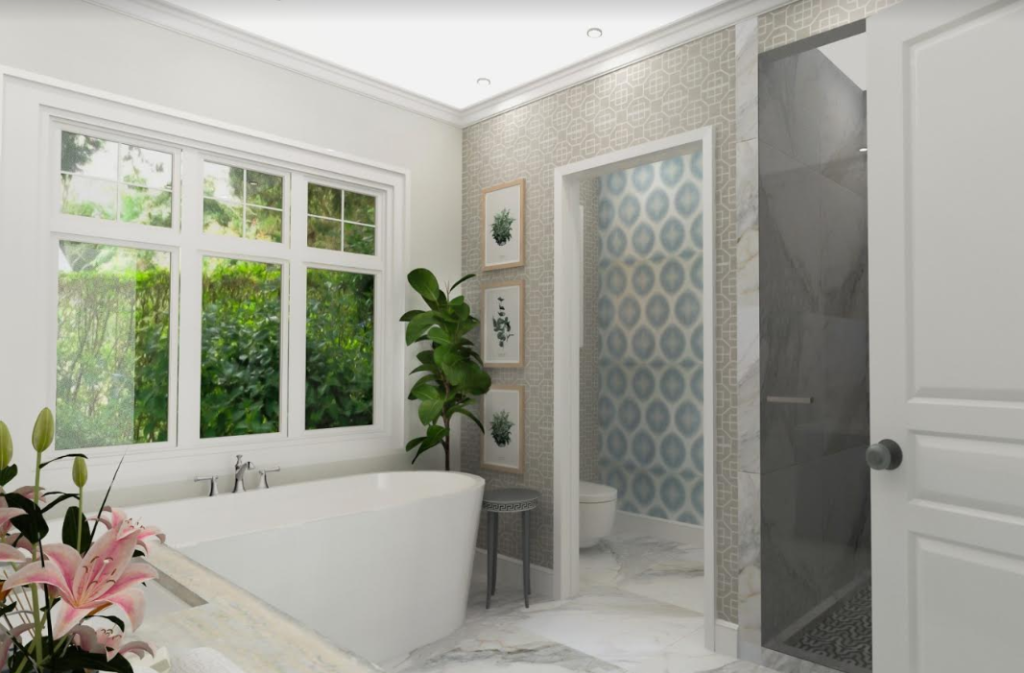
Clients Custom Master Bedroom, by Claire Jefford. Photo by Stephani Buchman
For the most part though, I don’t recommend that you go for too long without charging for the consultation meeting. Consider that when you don’t charge, you are not only taking time out of your business where you could be working on a paying client project, but you also need to factor in the cost of your gas; wear and tear on your vehicle and (if you follow my processes) you’re bringing clients a branded folder and a customised brochure that outlines your services and shows photos of your work.
Guess what? Those branding materials cost money. So eventually, I say you need to charge!
Always remember, at the end of the day, this is your business. You run it the way that works for you.
The beauty of being an entrepreneur is that you can try things for a little bit, and if something doesn’t work, then you can go back and try something else. Whatever you do though, be sure to never say these three things to clients.
Now over to you – do you charge for your initial consultation meeting?
One of the most common excuses I hear from people for not writing blog posts or creating videos, is that they are waiting for everything to be perfect.
Does this resonate with you?
Well, here’s the thing to remember – Perfect is NOT relate-able and it’s not AUTHENTIC.
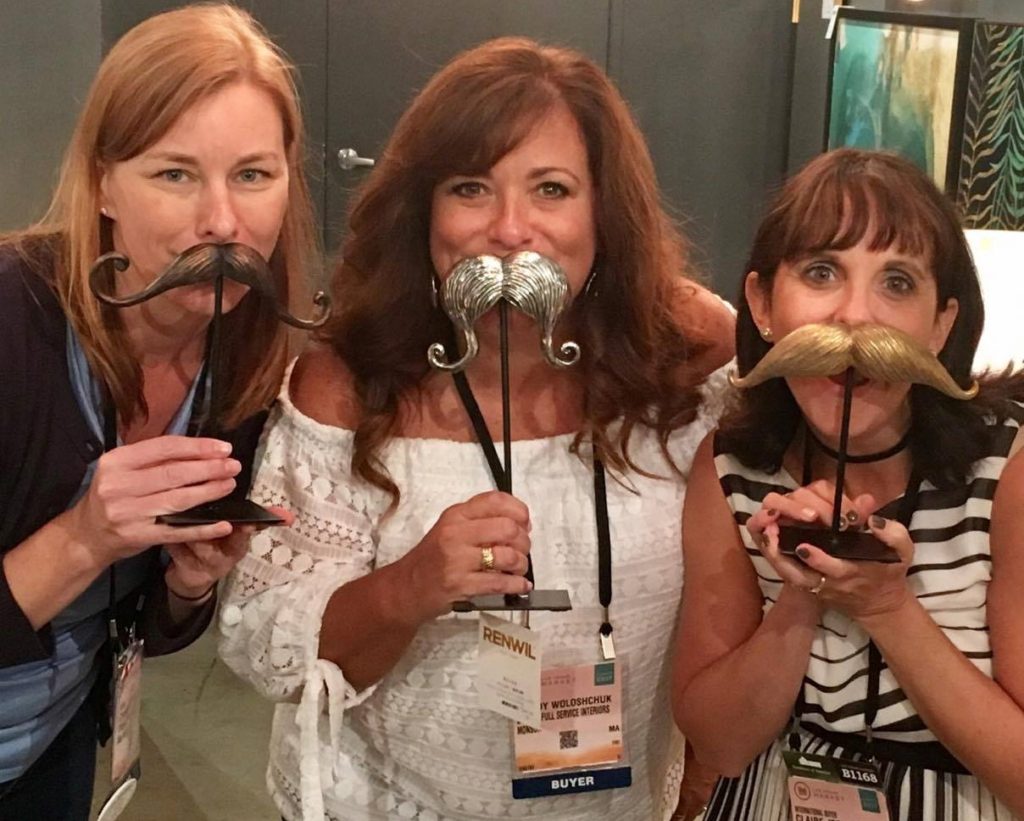
Having fun with close designer friends at High Point, 2017. FUN. SILLY. REAL.
Last week I had an experience that kicked me in the butt.
It reminded me of this:
While quality is imperative in many aspects of what we do, it’s not necessary that everything be all high quality, all the time.
Here’s what I mean.
I’ve been looking to hire someone to help with my social media, e-mail funnels and the back-end processes of my website. A good friend of mine sent me a referral. She introduced me & this gentleman via email, so we both had each others information to connect.
The next day, I get an email from him that included a 5 minute video that was made just for me.
Yes, JUST FOR ME.
From this initial contact, I was almost sold on hiring his services, and I hadn’t even spoken with him yet!
I was blown away that he actually took the time to review my website AND create a video to offer me suggestions of how he and his team could help me.
Don’t look at me like that. I’m telling you, it’s easy!
Sadly, many designers feel that if they give away too much information over the phone or even share too many ideas at the initial consultation, then clients won’t need to work with them.
The reality is, the opposite of that is actually true! At least with the really great clients…which of course we all want, right?
If this hits home, I have to tell you that it’s that kind of mindset that could very well be jeopardizing the success of your business.
Here’s what happens when you start sharing ideas that come from all your past experience and incredible knowledge of the Interior Design and Decorating Industry:
People begin to understand how much planning and details go into a project. They quickly realise how little they actually know about the process and can see that hiring you will save them time, money, stress AND it will be the best decision they ever made.
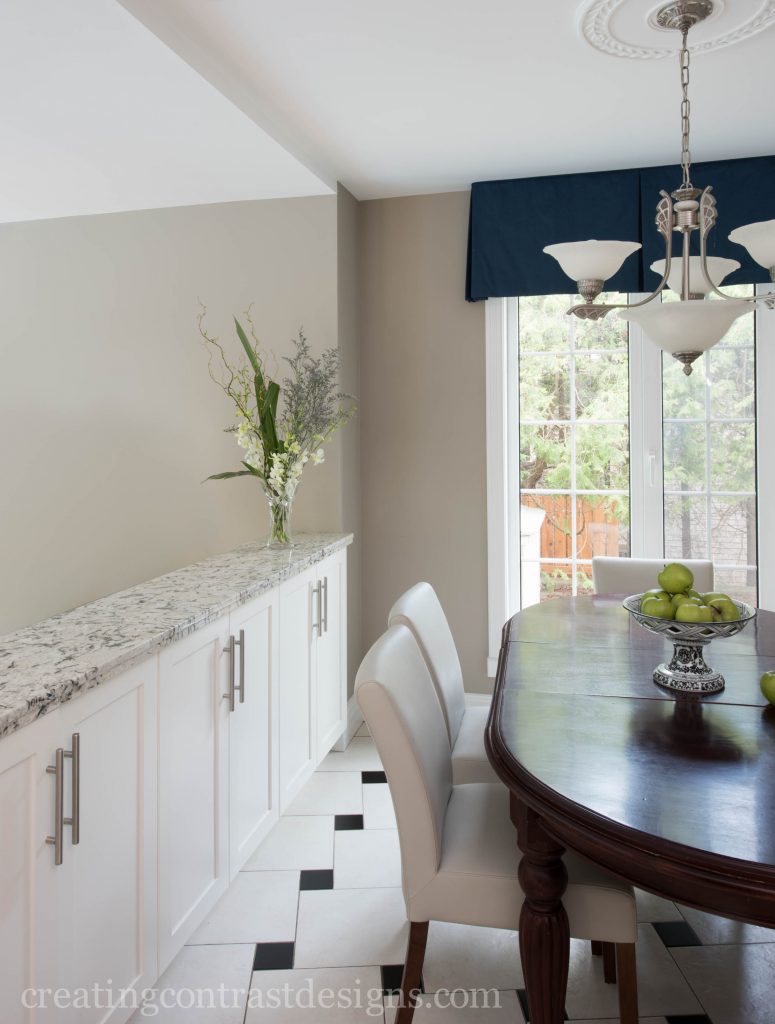
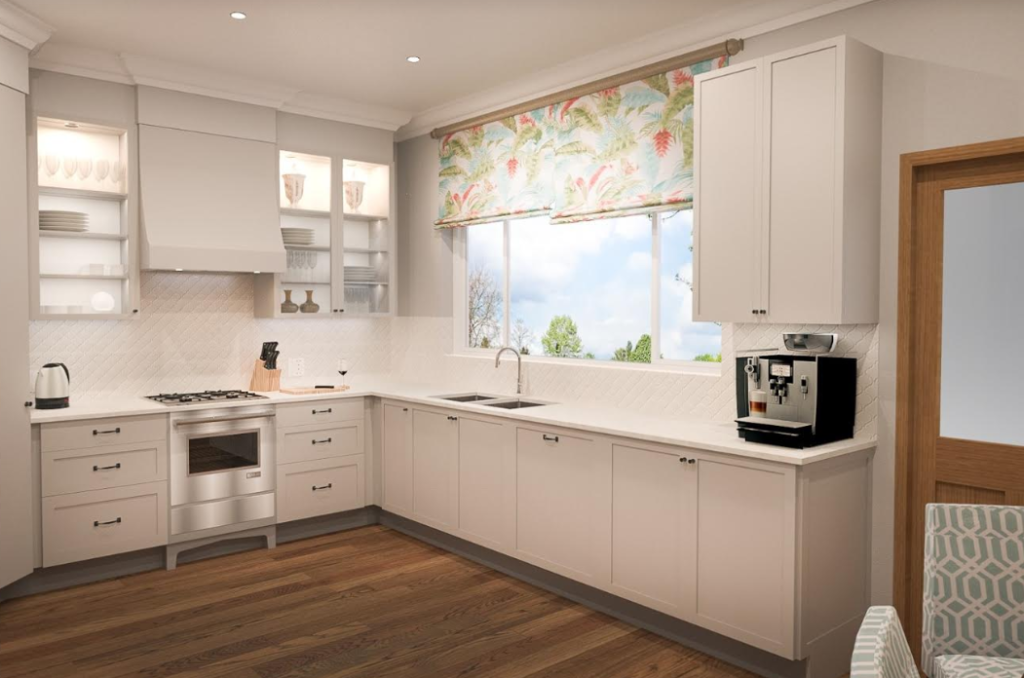
Clients eat in kitchen. Design by Claire Jefford.
Okay, back to this gentleman and his video that knocked my socks off.
You may be wondering what was in this video that was so amazing??? Honestly, there was nothing in terms of fancy graphics, music or pretty visuals.
It was simply the fact that he took the initiative to do some preliminary research about me and then sent a message that clearly stood out from what anyone else had sent me up to that point.
You can do this just as easily in your business. Here’s two quick examples.
Example #1
See below to a similar style of video that I did in June 2016, after an initial consultation meeting with clients.
Easy, peasy and not fancy, right? The video is not rehearsed; it’s personal and probably like nothing else that anyone has ever sent them.
Example #2
This is an example that I made to show you how easy it is for you to do something similar. I’ve added an intro/outro in order for it to make sense for those who find it on my YouTube channel.
What did you think? Not fussy at all, right?
By the way, my videos are edited in Camtasia, which is a software that is compatible with both PC and Mac.
Something Else to Consider
How long do you spend writing a follow up email to clients? These can take a really long time when you tailor it specifically to your conversation.
That video, (within the video) took less than 6 minutes to make. Add in the time it took to upload the video, write a quick email with a few links and it can still easily be done in less than 15 minutes.
Oh, and remember to turn off your notifications before doing something like this. Ha ha, as you can see, I forgot to do this when I filmed this example for you.
When we over-think things, we tend to stop dead in our tracks, because we turn it into this big ordeal and it then seems so overwhelming.
I challenge you to STOP overthinking & start DOING.
Comment below to let me know if creating a quick video for a specific client is something that you have done or is something that you will do. If not, why not?
There is no right or wrong answer here, but I absolutely believe that this is an outstanding opportunity to stand out & land more clients with video. Not only am I living proof in both my own interior design business and coaching business, but I can also now confirm that I have hired this firm, they impressed me that much with the video!
Need more confidence in making videos? Don’t sweat it, I can help.
Listen to my guest appearance here on a Well Designed Business Podcast with the fabulous LuAnn Nigara. The topic was all about leveraging video for your business & I share lots of practical advice.
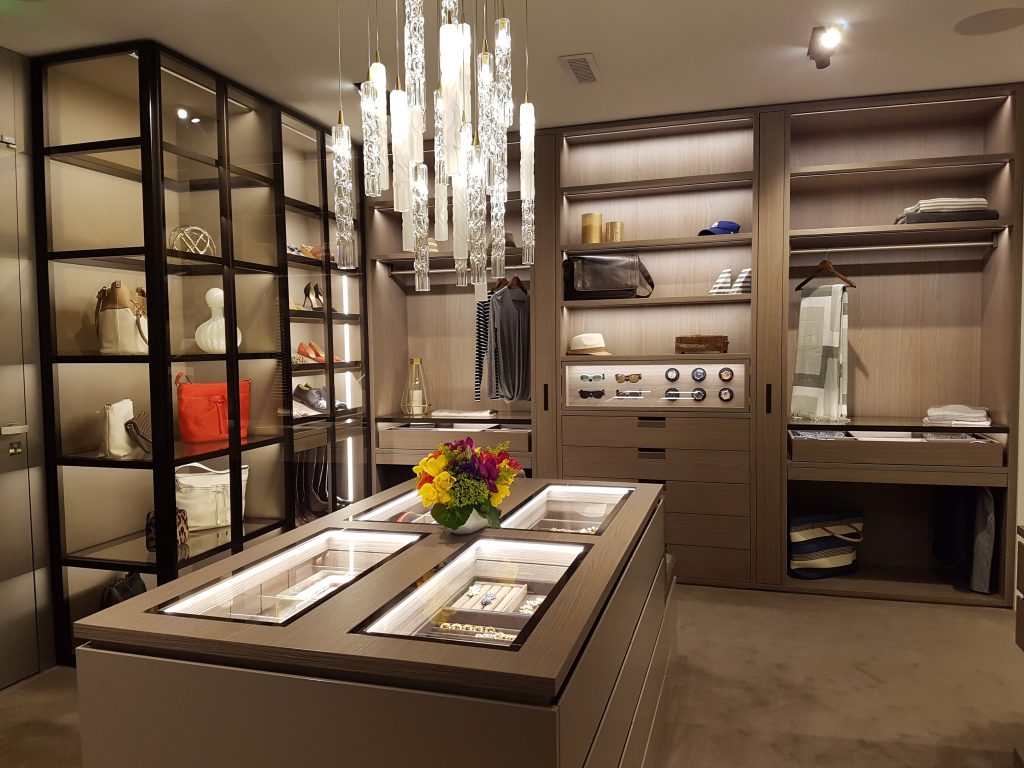
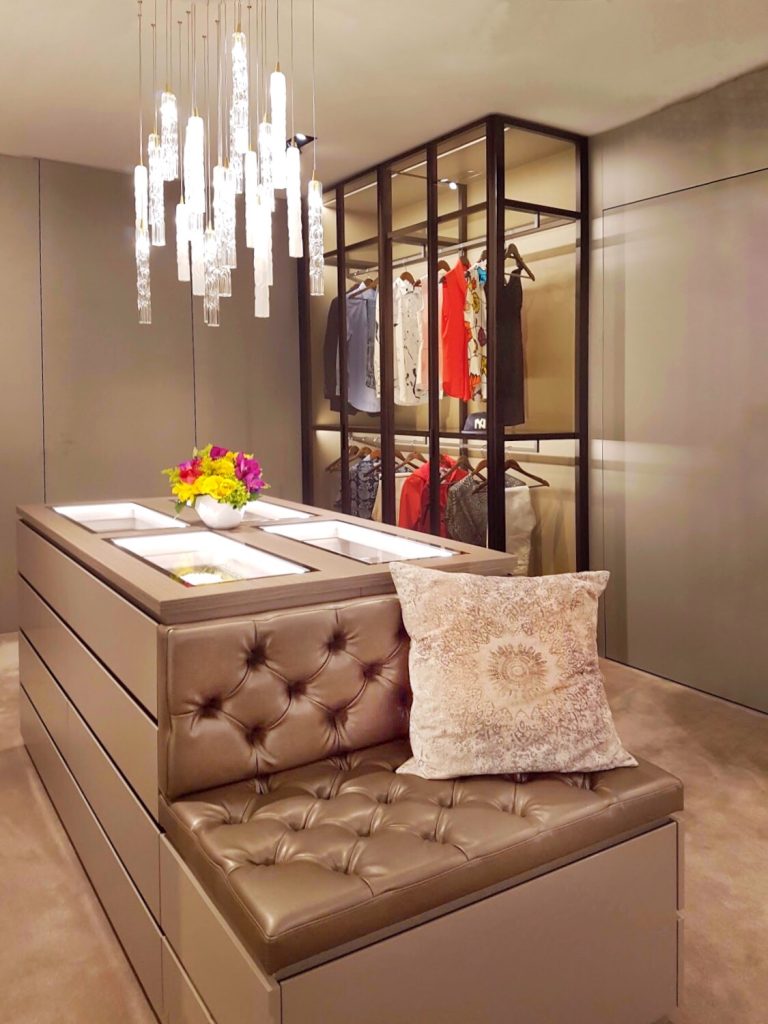
What does every Shopaholic have at the top of their wish list for their home? A dream closet, of course!
I found the perfect one at the Eggersmann Showroom on Day 2 of my trip to Los Angeles when we hit the L.A. Design Trail, sponsored by Design Milk and Modenus.
You can see what an important role lighting plays in a space like this. Not only does it add drama and elegance, but it’s also very practical for lighting up the inside of drawers and glass displays in order to see what treasures lie within.
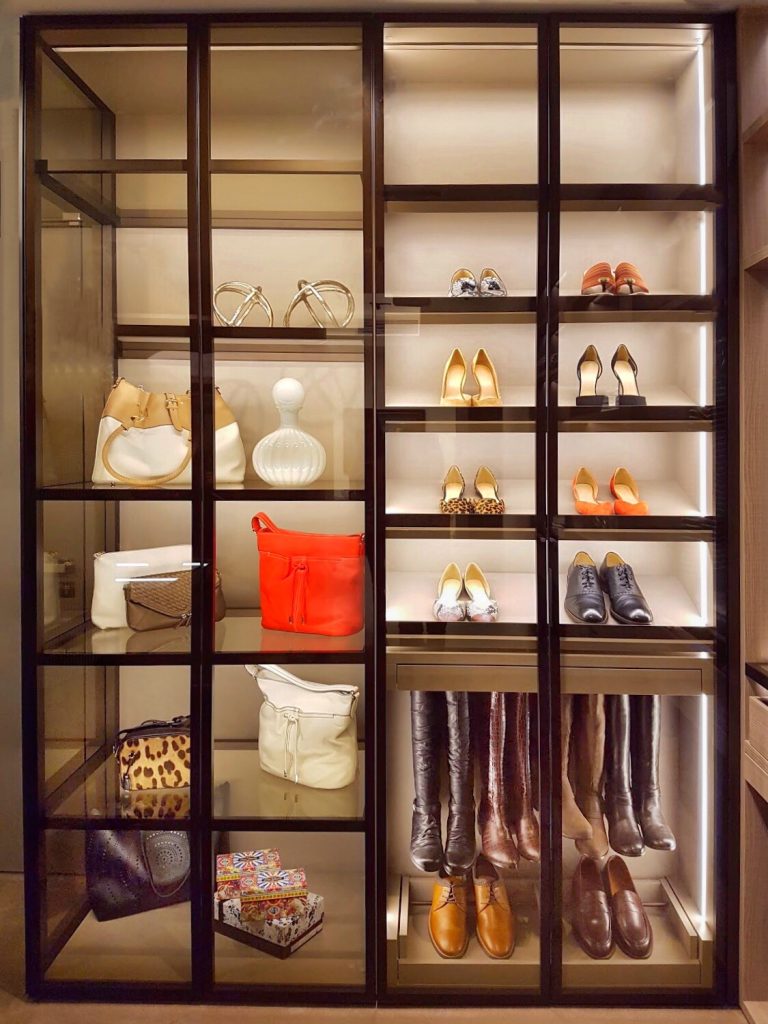
My closet is way too messy to be open glass, but this is very welcoming indeed! Photo touch up by Linda Holt.
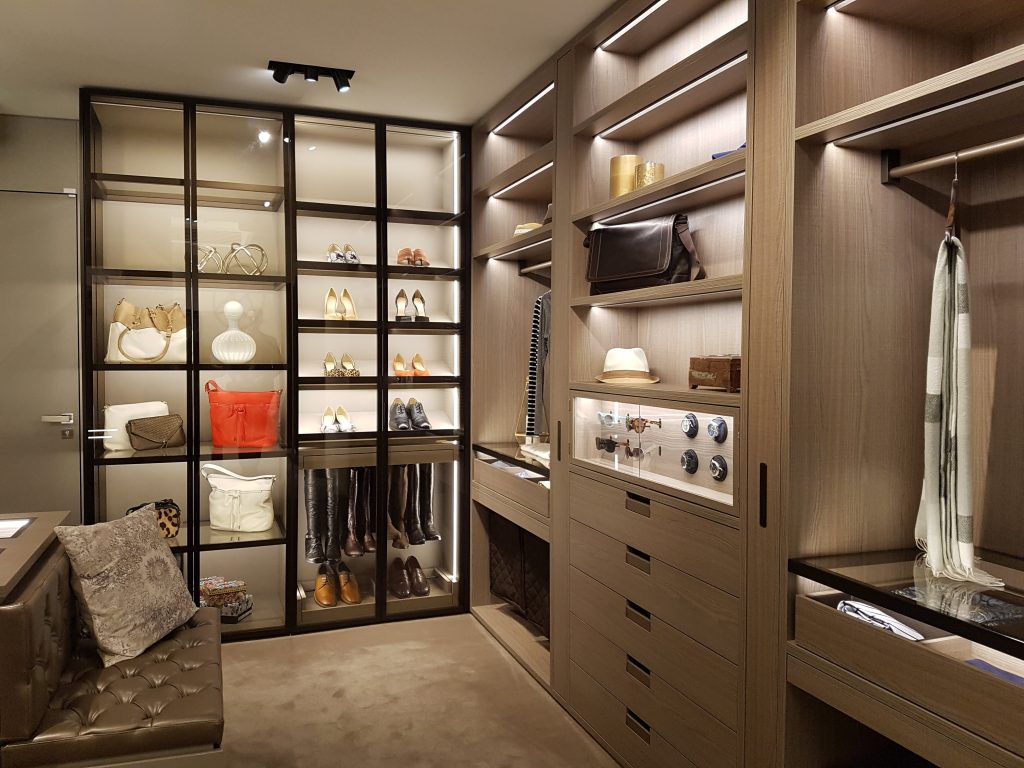
The dark frames create a nice contrast with the warm wood tones in this monochromatic colour scheme of neutral beige’s and browns.
The tufted leather bench seat is perfect for when you need to try on all of your 54 pairs of shoes in order to determine which will look best with your outfit. 🙂
Custom closet design to die for.
Notice the watches next to the sunglasses in the custom unit above on the right side? These actually spin every now and again because they are on what are called, ‘watch winders’.
A watch winder is a device used to keep automatic (also known as self winding) watches running when not worn. Who knew?!
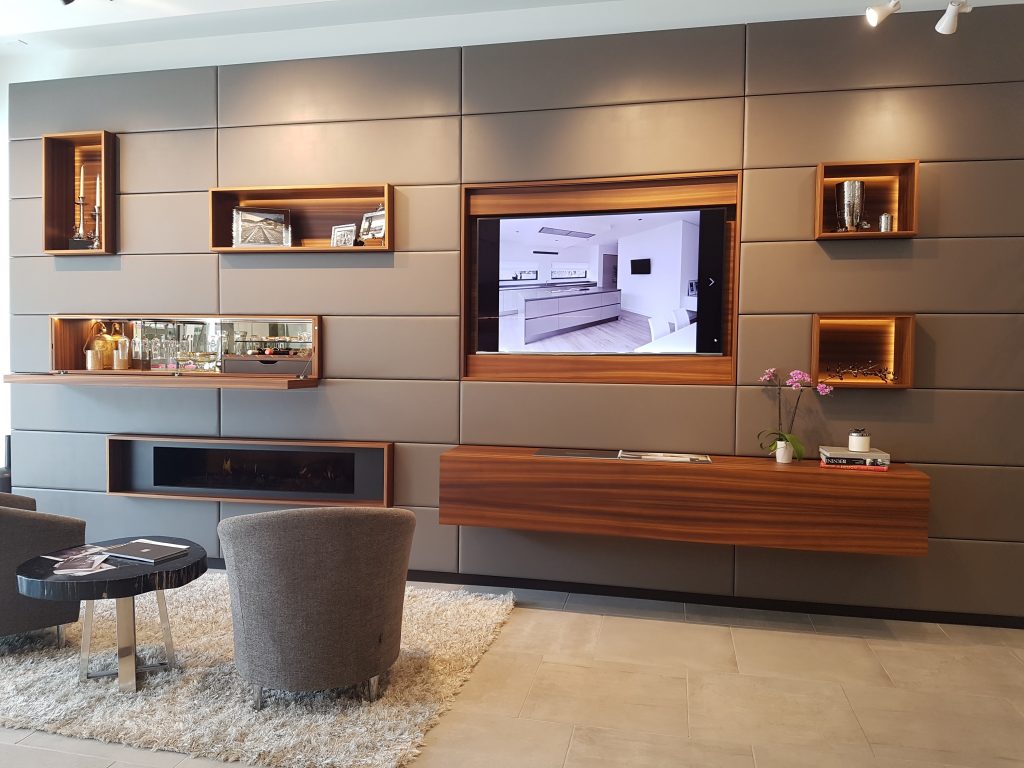
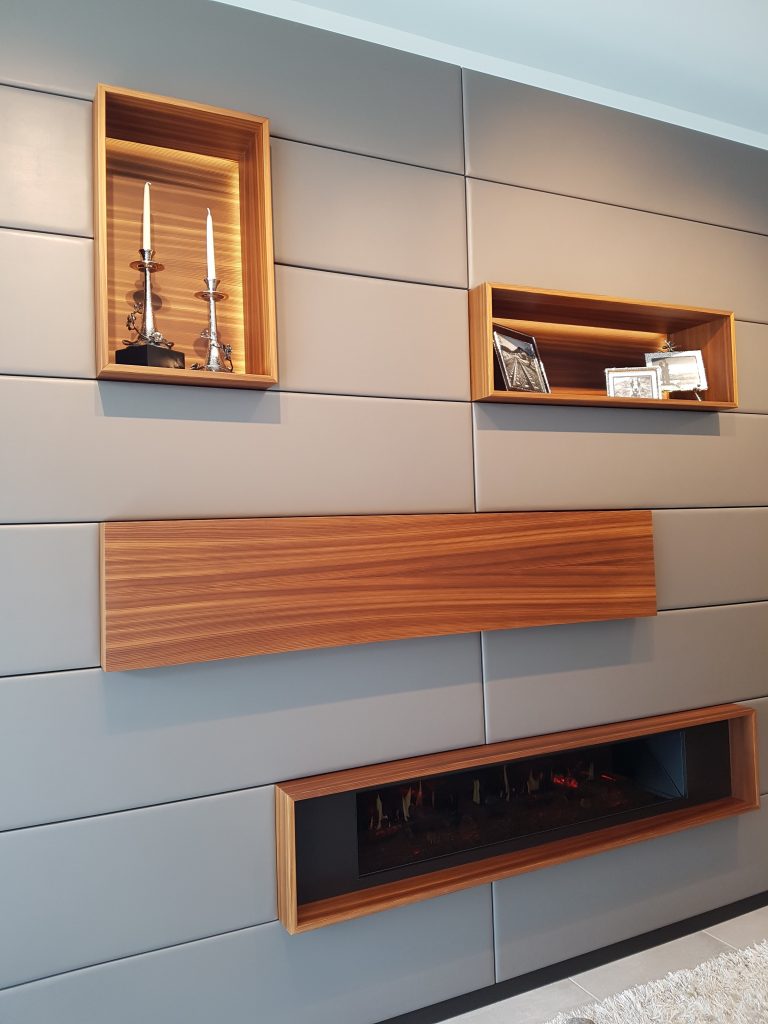
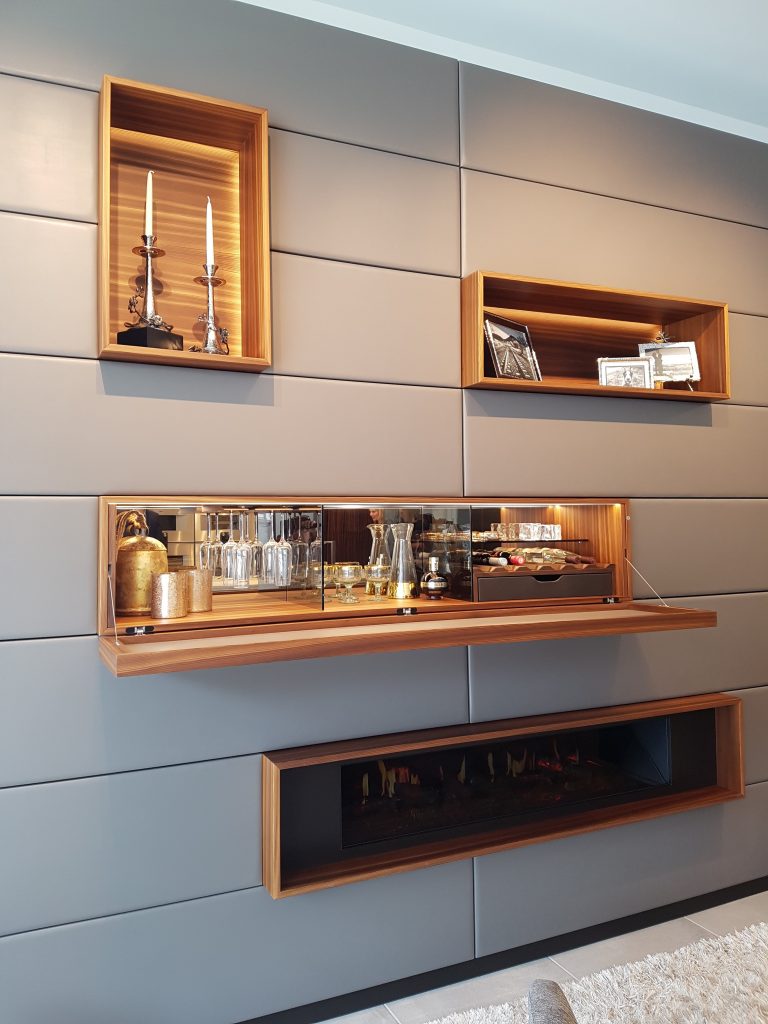
Sleek Feature Wall
Below is the statement feature wall you see as you enter the showroom. It’s a mix of taupe coloured leather panels and beautiful wood cubbies.
See the TV in the middle? With a push of a button, it actually turns into a piece of artwork! The entire panel drops down to reveal a piece of art where the TV once was. Perfect if you do not want the television to be a distraction when entertaining in your home.
Another cool feature is that many of these leather panels open up with a simple, soft push to either the top or bottom. This offers fantastic functionality for useful storage, similarly to the open wood shelving of which some can also be shown either open or closed.
I love how they made it a mini bar!
There are plenty of fabulous finishes to choose from as well, so you can customise these statement walls not only by the functional part of the design, but also based on the look and style you desire as well.
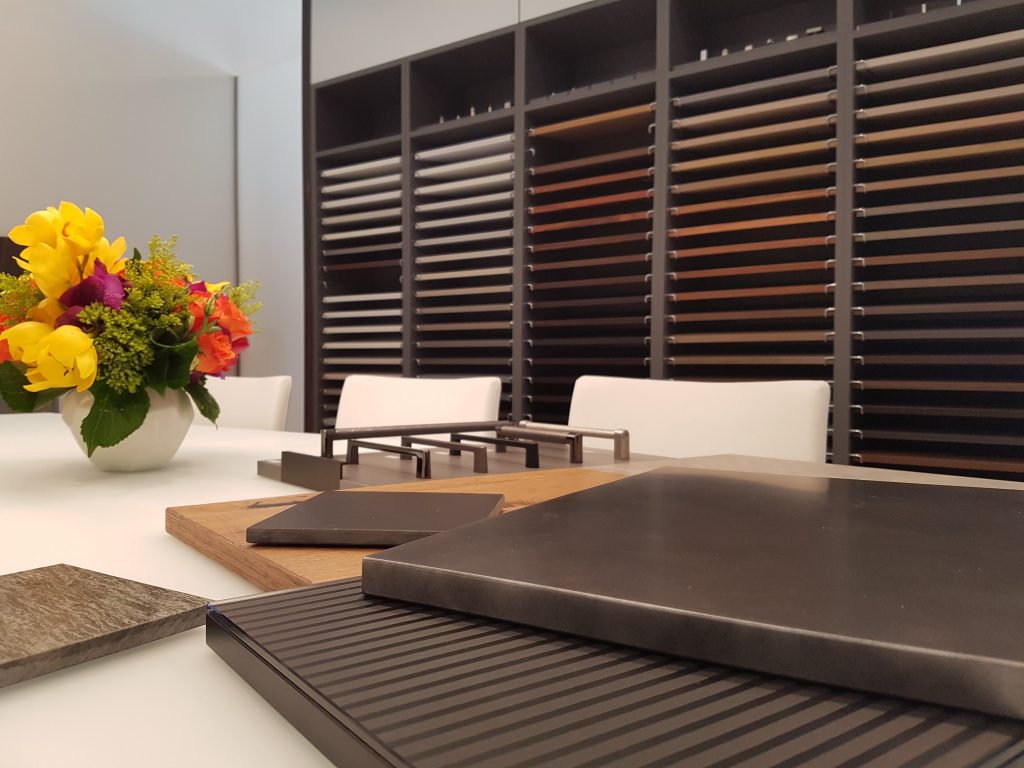
In house design centre for your convenience
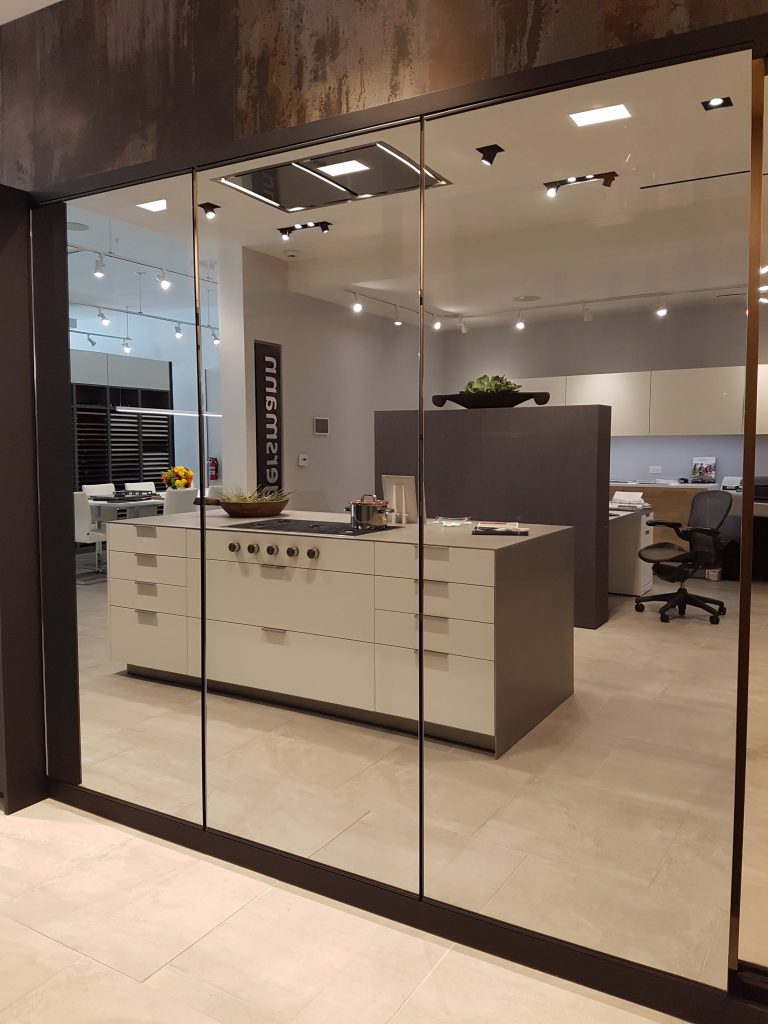
Mirror Mirror on the Wall
Many of the big cities around the world have steadily increasing populations and are very limited on space when building new developments. This is why it’s super important to be able to identify the need for smart storage solutions that take up minimal space.
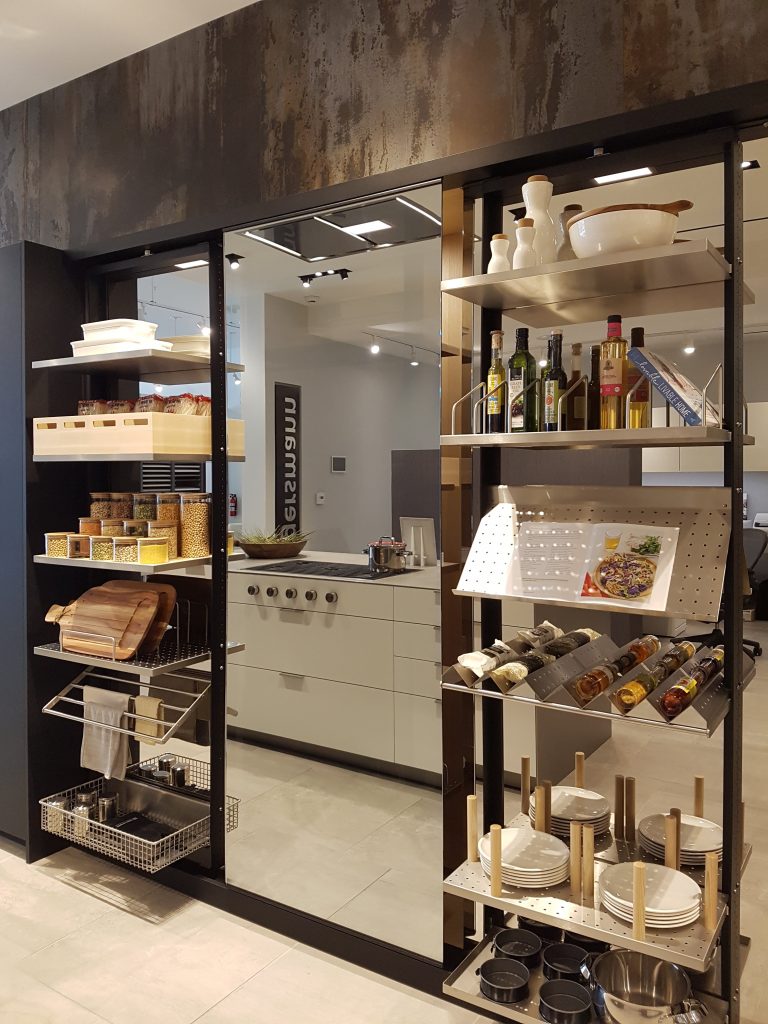
Above you can see what looks like a wall of mirrors, but it’s actually very clever compact storage.
Mirrors are also great for making a space appear larger and brighter. There is one concern that I have however, and that is the maintenance in which this would require to keep clean, both on the outside and on the inside. If you are OCD when it comes to finger prints on mirrors, that finish may not be right for you.
On the other hand, if you are vain; addicted to organisation and need to maximise function in your home, this solution from Eggersmann may just be the answer to your prayers.
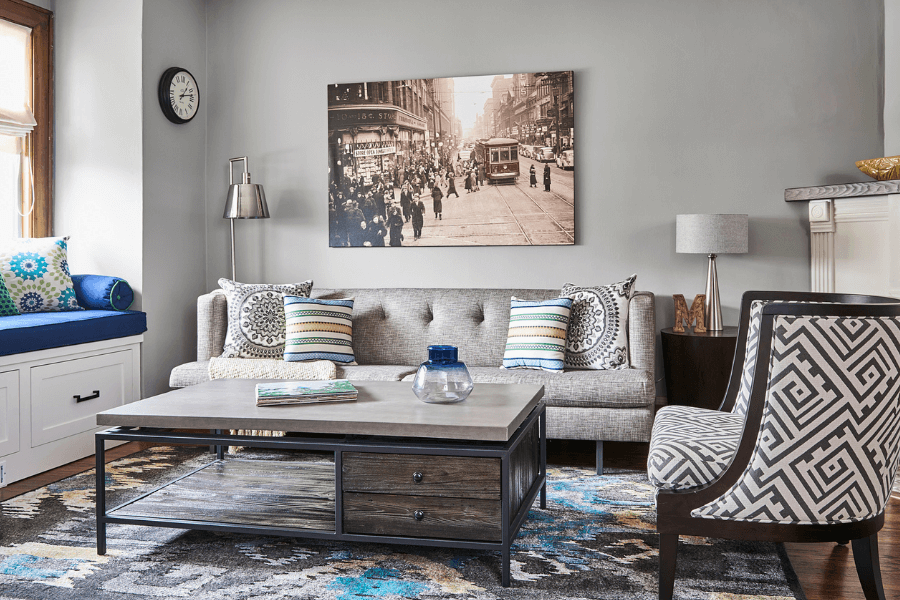
Hey, I recognise that stylish tile surround on top of the mirrors! We used a similar one in the living area of the 3000 square foot basement I designed a few years ago.
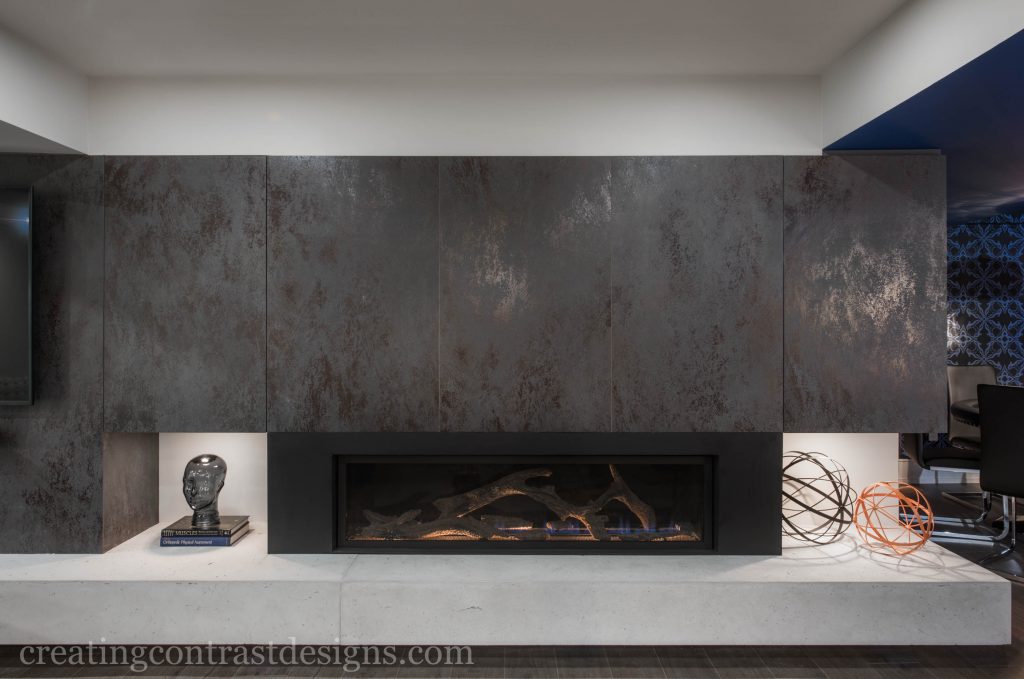
Clients stunning fireplace feature wall with concrete hearth. Photo by Stephani Buchman.
See more from my trip to L.A. in this post where I got to drive a sexy electric sports car…that I nearly crashed.
I’ll get to my video with me and another woman in bed soon.
But first, tell me this:
Do you ever get frustrated with how long it takes you to write a blog post? I know I sure do.
The worst part is, that after you’ve done all that work and hit the publish button, a few days later you notice that NO ONE has read the darn thing! Am I right?
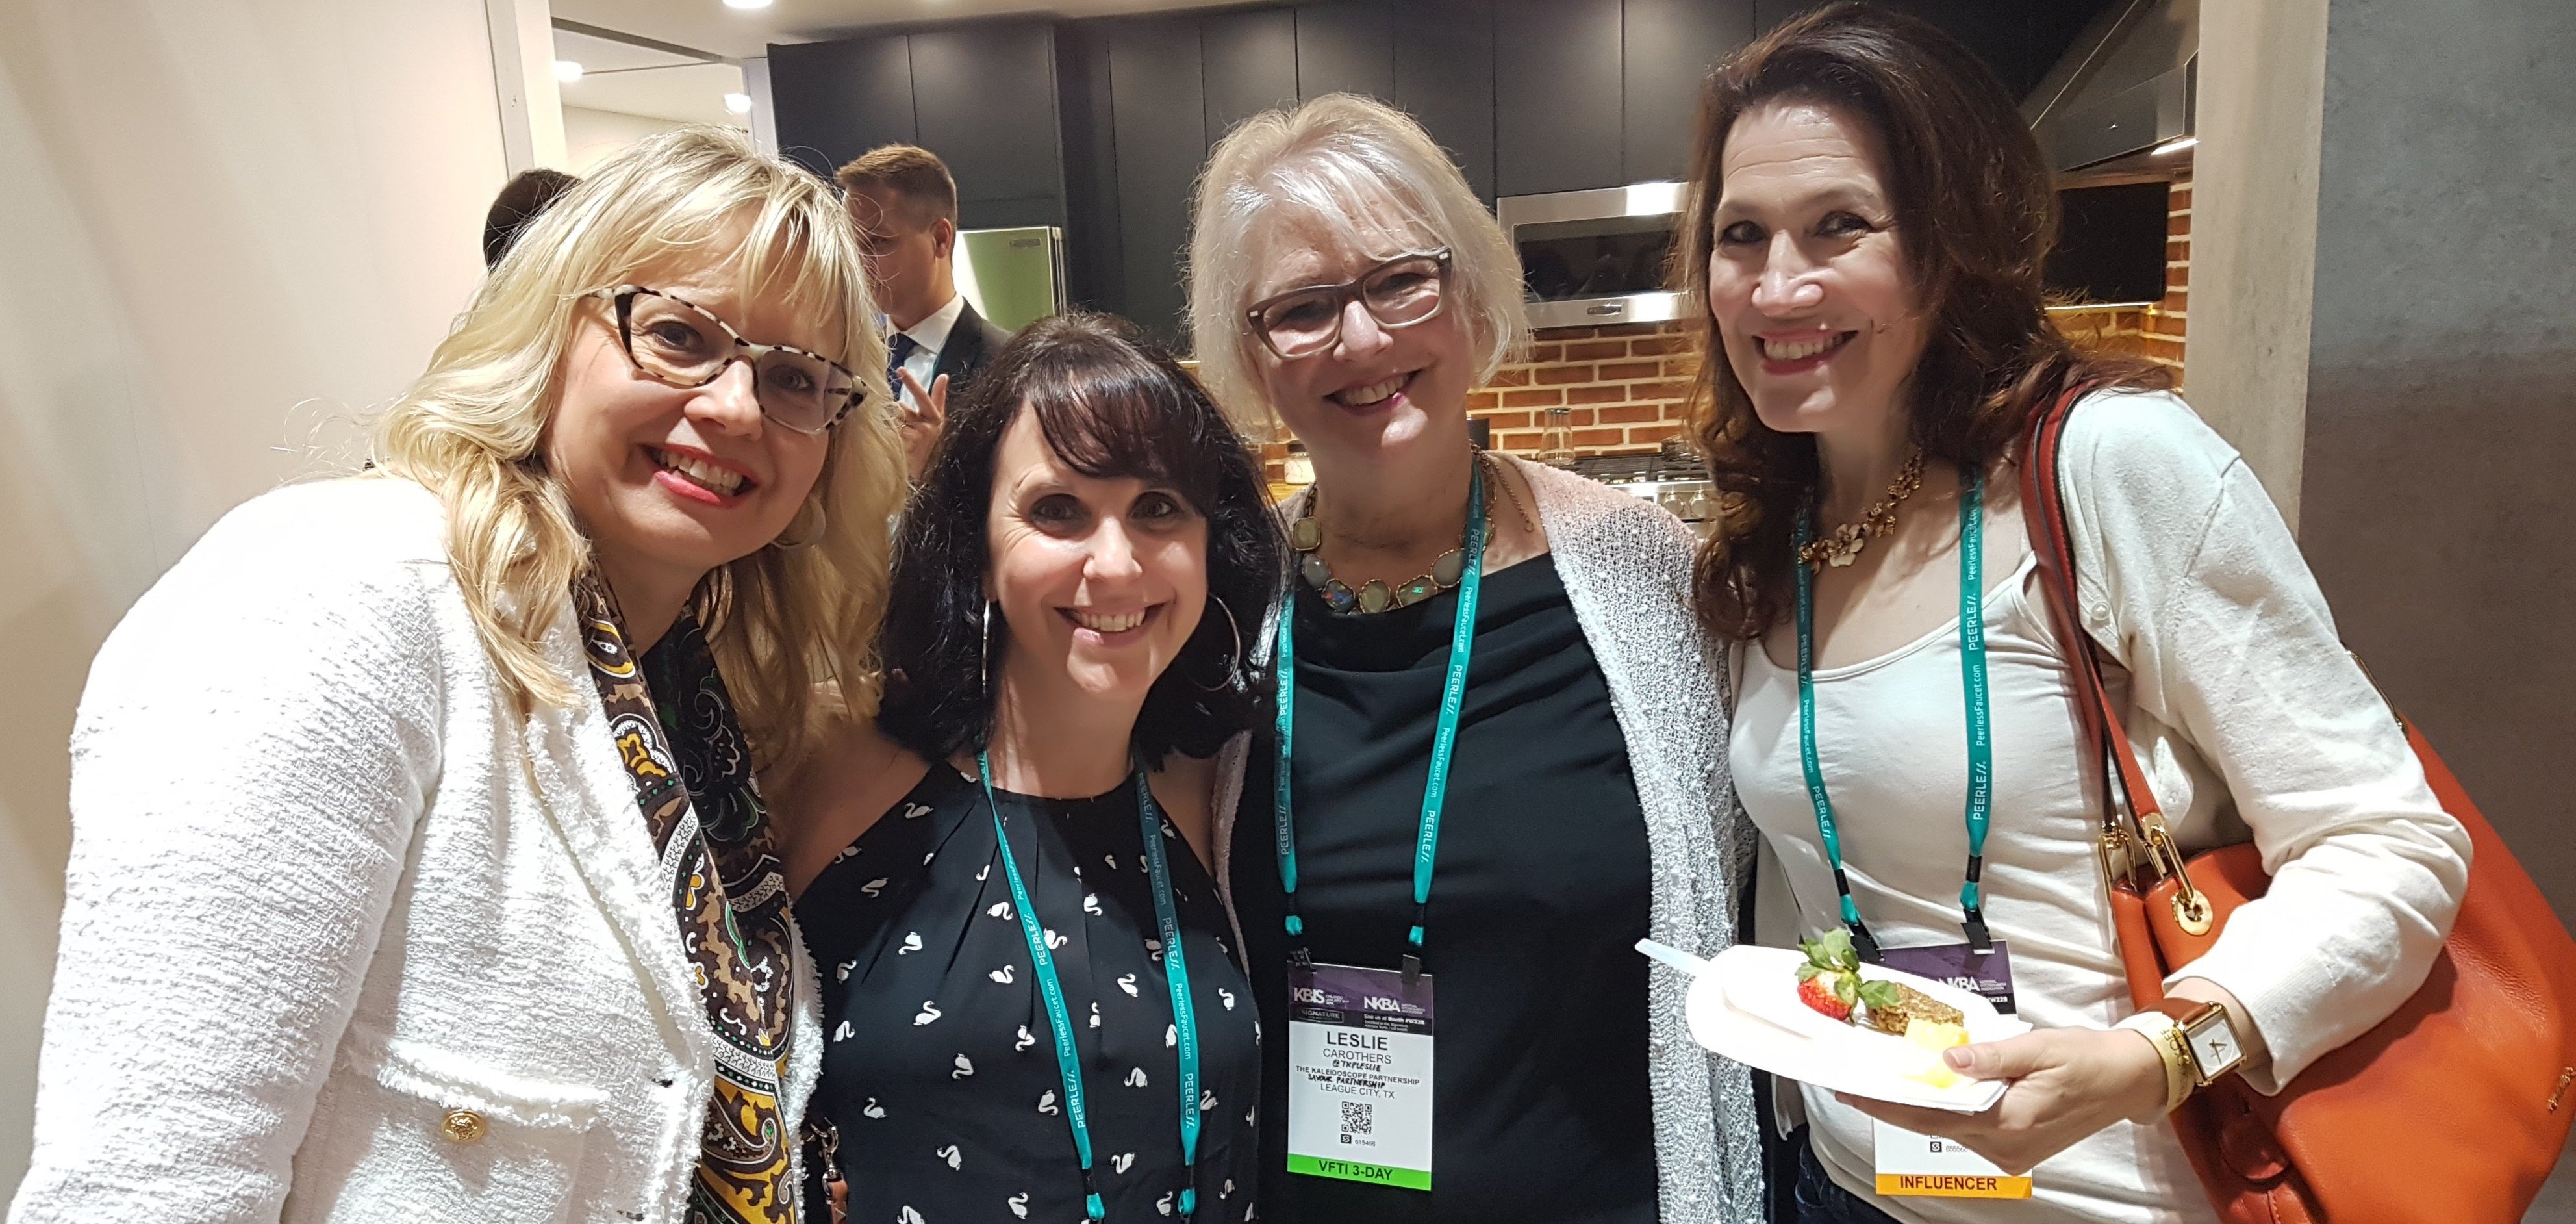
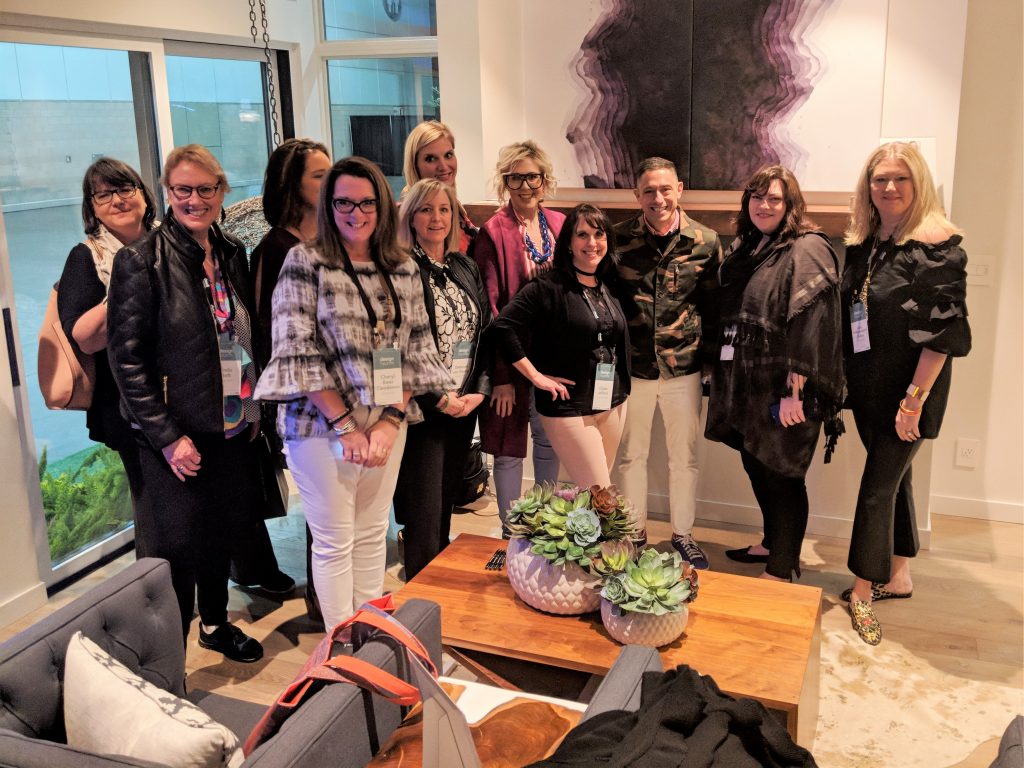
You may remember that earlier this year, I moderated a panel at KBIS (Kitchen and Bath Industry Show) in Orlando. The discussion revolved around blogging, building an email list and making money by selling products on line.
Here is a photo of me with my beautiful panelists.
I feel very lucky to know all of these lovely ladies on a personal level and was thrilled that they were so generous with their time & with the information that they so willingly shared.
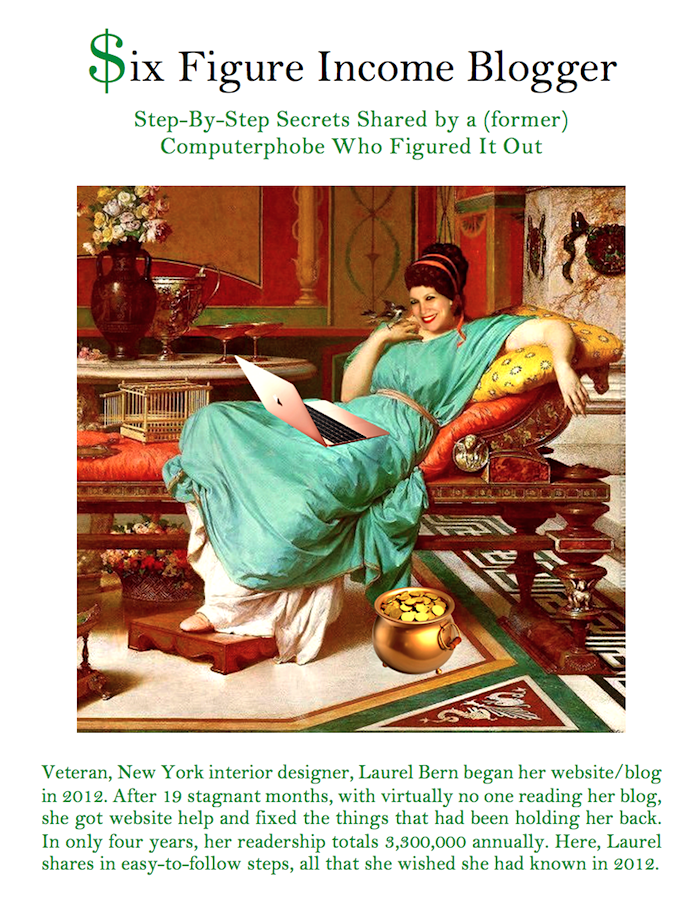
If you are familiar with Maria and Laurel, you probably know that they are making a very decent living off of their blogs. They both have extremely helpful online products that they offer to their loyal audience.
Creating your own online product is my number one recommendation to anyone who wants to earn passive income through their website or blog.
Affiliate marketing can be lucrative too, but not until you have A TON of traffic coming to your website regularly.
These beautiful bloggers weren’t always yielding high numbers of page views and monthly site visits. In the beginning, as with anything, it took time to gain traction and build a faithful audience.
If you have been blogging for a while and feel like you are spinning your wheels, I have some good news for you.
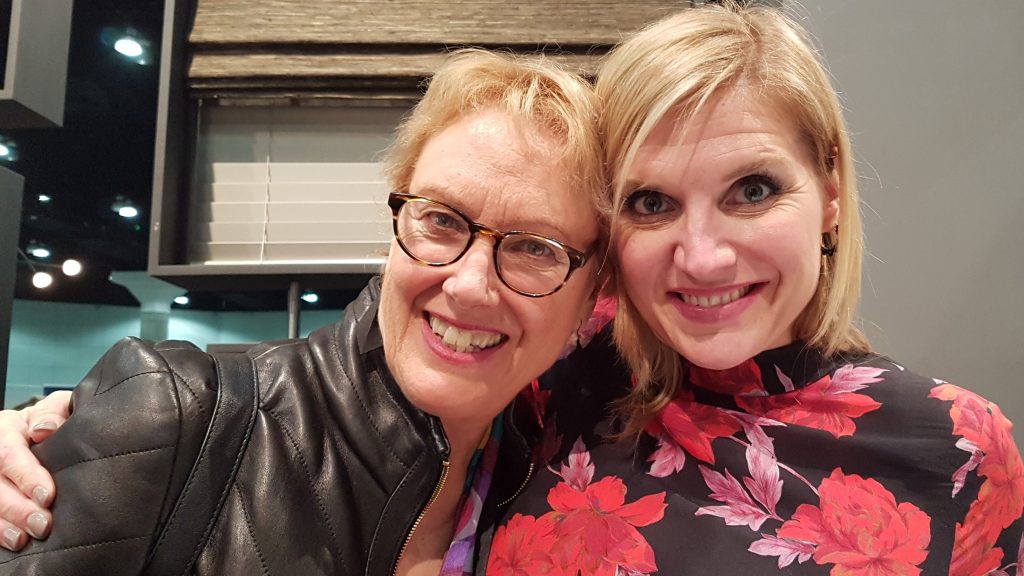
Click on the video below to see why Laurel and I are in bed together.
If you can’t wait any longer to get the guide, click here.
Please know that I have an affiliate arrangement with Laurel, so I will make a few bucks if you buy this insanely valuable guide.
It’s important to note, that I won’t back just anything. Laurel provides incredible value and doesn’t hold back when it comes to sharing insider tips and ‘need to know’ information, we kind of have that in common.
This is why I stand behind this guide 100%. I know the frustrations of blogging to crickets. It is not fun.
Regardless of whether you want to sell your own products or do affiliate links in the future, the most crucial element to having a successful blog and business, is that people need to be able to find you.
If people can’t find you, then they will never know about all those amazingly helpful tips and useful advice that you have to offer!
If potential clients don’t know that you exist, you can’t get them on your email list and eventually seduce them into wanting to hire you for local decorating services or E-design services.
That is why it is super important to have strategies in place, in order to get found on the world wide web.
Laurel says that is she had all the information within this guide when she started blogging, it would’ve easily saved her 18 months of trial and error….18 months of getting it all wrong.
Wow, 18 months is a long time to waste.
I’m having a new website redesigned as we speak & I am not wasting a year and half to get my butt in gear.
Why am I doing a new site? Because I currently have two websites.
After speaking with Laurel and reading her guide, I realised that having two websites is not good for a number of reasons.
So, now I will incorporate both sites onto one.
Plus, I don’t want to waste time making mistakes at ‘trying to figure it out’. I don’t have time to guess, I want to do it right and get results.
For me, taking advice from someone who is actually succeeding at something, is imperative. That is my philosophy for my own coaching business.
I don’t make recommendations to you as a designer based on what I “hear” has worked for others. I’ve walked the walk, so I can talk the talk. That’s just the way I roll!
Laurel and I, Orlando 2018
This is why I will be implementing a lot of Laurel’s advice from the guide into my own new website.
It’s available at a promotional price from Wednesday April 25th through to Monday May 6th.
Plus, she’s added more than 5 chapters that focus on SEO, but in plain English that should make it easy for you to understand. Phew!
Here is the link again to the ‘Six Figure Income Blogger’. I can’t wait to implement the changes on my new site as I get ready for world wide web domination!
Got a question? Comment below and I’ll get back to you soon. xo
Before I head out to any trade show, I rarely have the opportunity to do much research about the location and my planned itinerary.
However, I don’t think that this is necessarily all bad.
I typically have no pre-conceived ideas about what to expect from a show or set high expectations…except that I do know that when it’s an event organised by Veronika Eagleson and her team at Modenus, there is NEVER any disappointment on these ‘Once in a life time’ tours.
Who let the #designhounds out? Find out more about these wonderful women here.
Oh, and don’t be suprised if you may hear that expression “Once in a lifetime” a few times over this 3 part blog series from L.A’s Dwell on Design. Stick around, because I am promising you plenty of remarkable interior design eye candy from this trip!
MY FAVOURITE THINGS: TOP 5
I’m breaking out my Top 5 and while my ‘Favourite Things’ are in no specific order, I am kicking it off in high gear…oh yeah, that pun was totally intended.
(sponsored post FDA etc)
#1: My Karma Revero Test Drive – Look out L.A.!
You know what they say about Karma, right? Well let me tell you, this electric sports car is the sweetest ride I’ve ever driven!
The Sleek Karma Revero
Not one to shy away from the limelight, I couldn’t help but to flail my arm around like crazy, nearly knocking down fellow #designhounds when asked, who would like to drive one of these brand new, high end, luxury sports cars? Uh, moi!!
This super sexy European car by Karma Automotive, won 2018 Luxury Car of the Year and is the smoothest drive I’ve ever had the pleasure of experiencing. Watch the video below to see this sexy beast in motion…I’m referring to the car by the way, not me. HAHA!
When I hit the button to ignite the engine, my passengers and I didn’t even know the car was on!
It was a little bit of a tease that I wasn’t able to put my foot down fully & really appreciate the grace and speed in which this car is capable of, but I did manage to hit the accelerator a few times to get a sense of it’s power.
TNT: THE NAKED TRUTH
I actually came quite close to hitting a red pick up truck as I attempted to change lanes during the 15 minute drive. Thanks to Natalie Reddell for her high pitched scream in the back seat, as she alerted me to this in order to avoid what would’ve been a NOT so hot start to my trip! Natalies’ IG video seen here, could very well have come true. #Funnynotfunny.
For the very first time, I had the pleasure of not only hearing the renowned Potter Jonathan Adler speak, but I also got the opportunity to meet the man himself.
#designhounds posing with the incredibly talented Jonathan Adler
Jonathan is very interesting to listen to, he is funny and personable. He speaks openly about his remarkable career and how nothing was carved out in stone in terms of a plan to his success.
Click on the video below by Adobe Creative Cloud to find out more and see some of his sensational work. (FYI – there is some foul language used by Jonathan in this video)
My final word on Jonathan Adler…well, they are actually his words that made much of the audience laugh out loud:
“When it comes to decorating, the wife is always right…unless your husband is gay”
#3 THE DESIGN BOX CHALLENGE
While there were actually four winners of this Design Box Challenge, the one featured below was my absolute favourite.
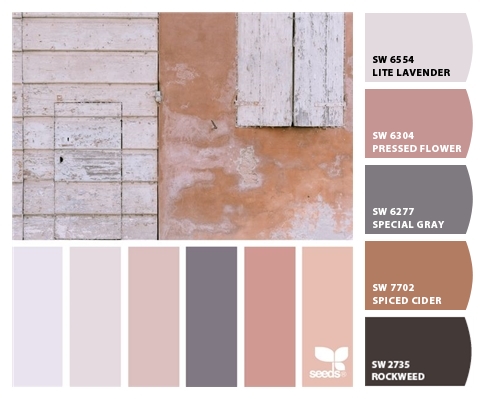
These soft and pretty pink paint colours are from Sherwin Williams. SW 6304 Pressed Flower & SW 6303 Rose Colored. Below is another gorgeous palette that I found here on the SW site.
Lucky for us, we are spoiled for choice when it comes to colours, patterns and styles for window treatments. The Shade Store had a terrific display at the Dwell on Design show that inspired many of us #designhounds.
I recorded a demonstration of how to use their Day/Night Cellular Shades, which you can see in the video below from my Interior Design YouTube channel.
These shades have a ‘top down/bottom up’ function. Multi-functional treatments are always in style, because the more versatile a product is, the likelihood that it will hold more longevity for home owners = more bang for your buck!
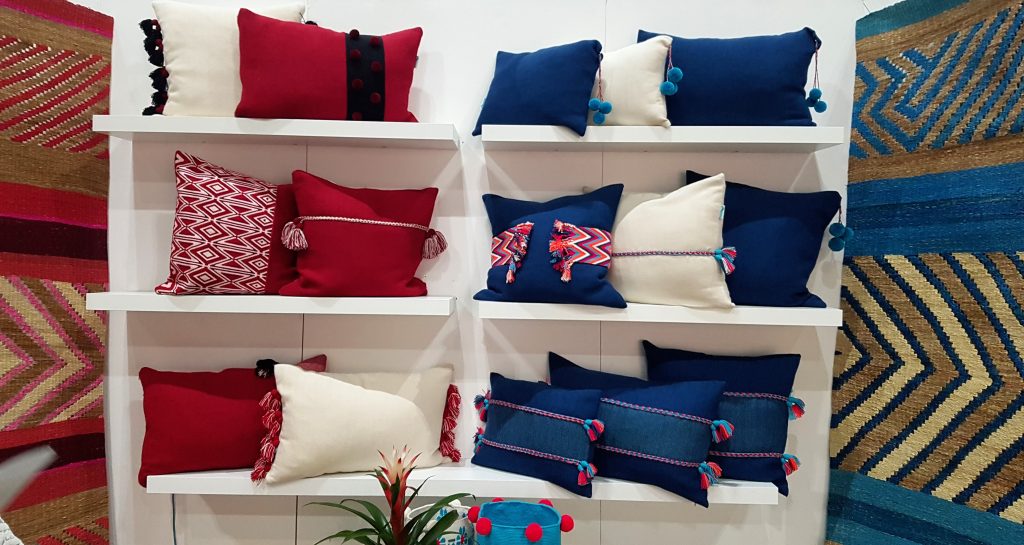
#5 Bold & Bright Coloured Accent Pillows
Last, but by no means least, I absolutely fell in love with these decorative and bold pillows & rugs by Xiema Rozo Design. The pom pom and tassle accents are totally adorable.
Hand-woven in Bogota, Colombia by expert artisans
I especially loved to hear the story behind these hand crafted pieces, as it adds to the beauty of the products and the brand. This excerpt was taken from the website and gives you a little glimpse into the people behind this charming, bold & colourful decor.
“These exquisite soft fabrics are complemented by a beautiful belt handcrafted by Wayuu women, indigenous from La Guajira, Colombia. We used the rich cultural and creative heritage of indigenous Latin American communities as a means of fostering their economic and social development.”
Remember, this is only Day 1 of my 3 day adventure on the tour hosted by Modenus. More to come soon!
But first, we end with a striking skyline view of Los Angeles from the Dwell on Design Rooftop party. I know, it’s a tough job, but someone’s gotta do it.
Living the Highlife in L.A.!
Which one of my favourite finds is your most favourite?
Wall gallery displays in Interior Decor have become a popular way to dress up the walls in your home. To ensure you get this focal wall just right, I’m sharing a few guidelines with you that I like to follow.
You want to make sure that your hard efforts of creating a gallery wall in your own home will pay off to give you your desired look, especially before putting holes in that wall!
You’ll also see:
My rules to follow for creating a gallery wall in your home
What to consider when choosing your wall art and your frames
How I created a simple (& inexpensive!) gallery wall as a focal point in my own home
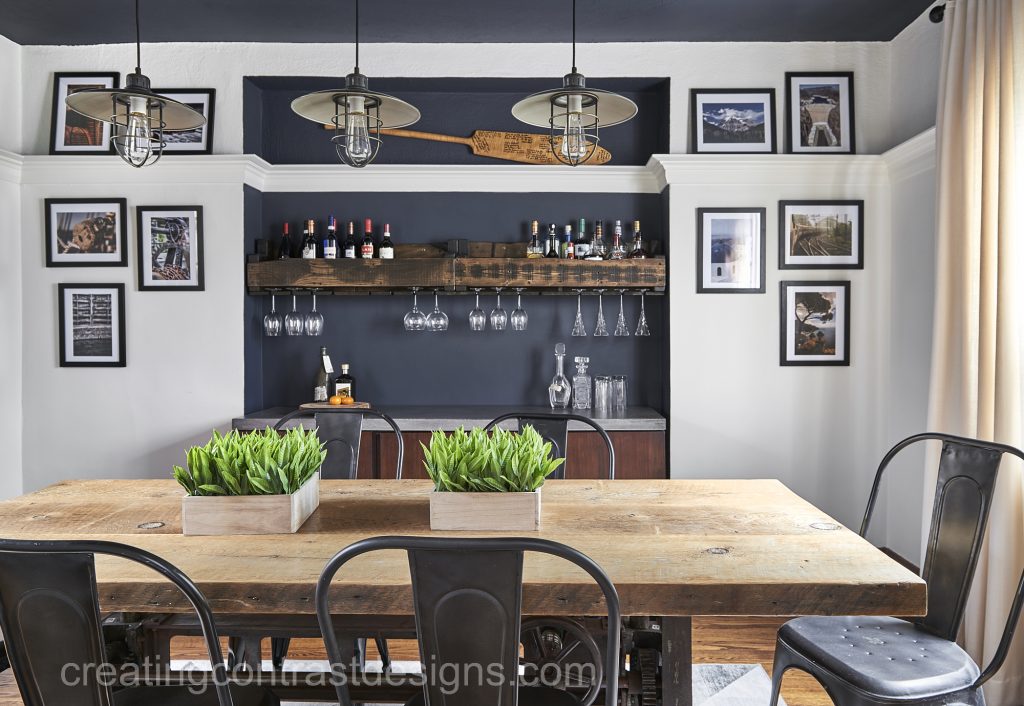
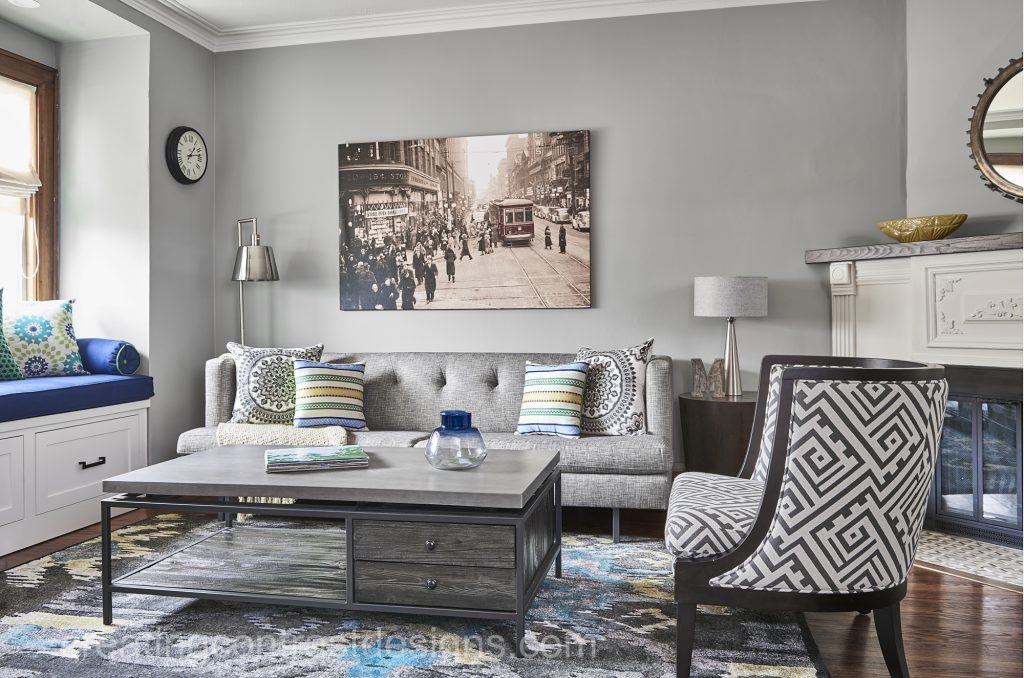
A foyer & dining room of two different client projects using their photos to personalize the space
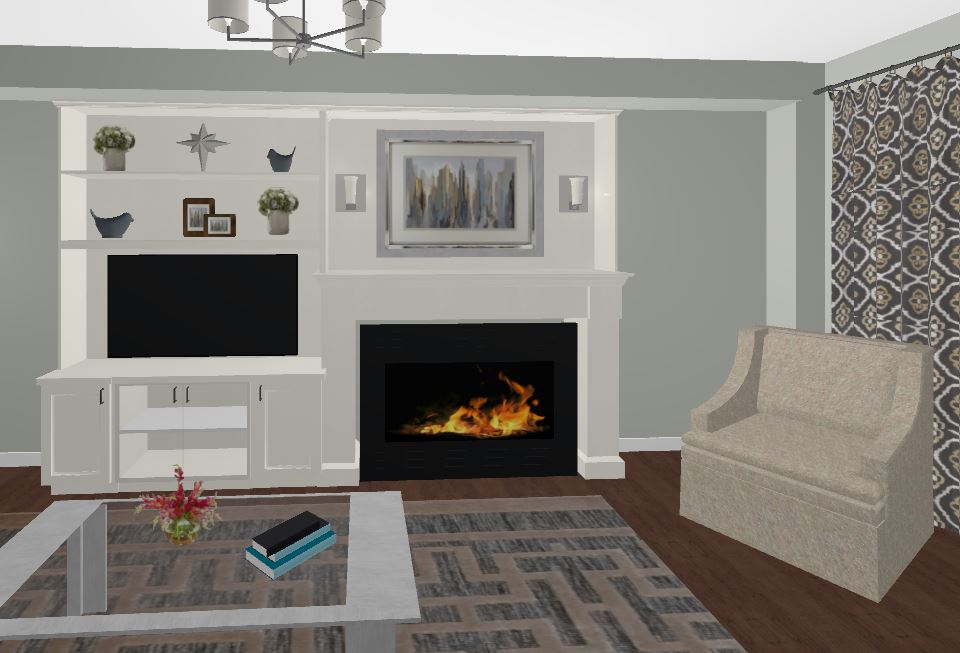
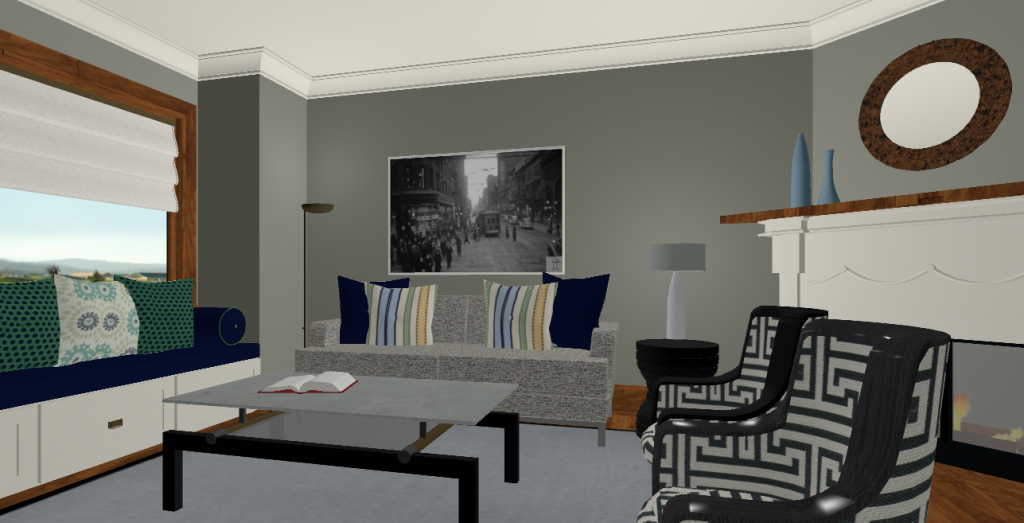
3D renderings to allow clients to visualize my ideas for these accent walls within their home
Are you ready? LET’S DO THIS!
PLANNING:
If you know me, you know I like to plan, so this is very important.
My rule is that there should be at least one commonality throughout the entire gallery wall, one element tying it all together. The first thing you need to do is:
PICK A THEME
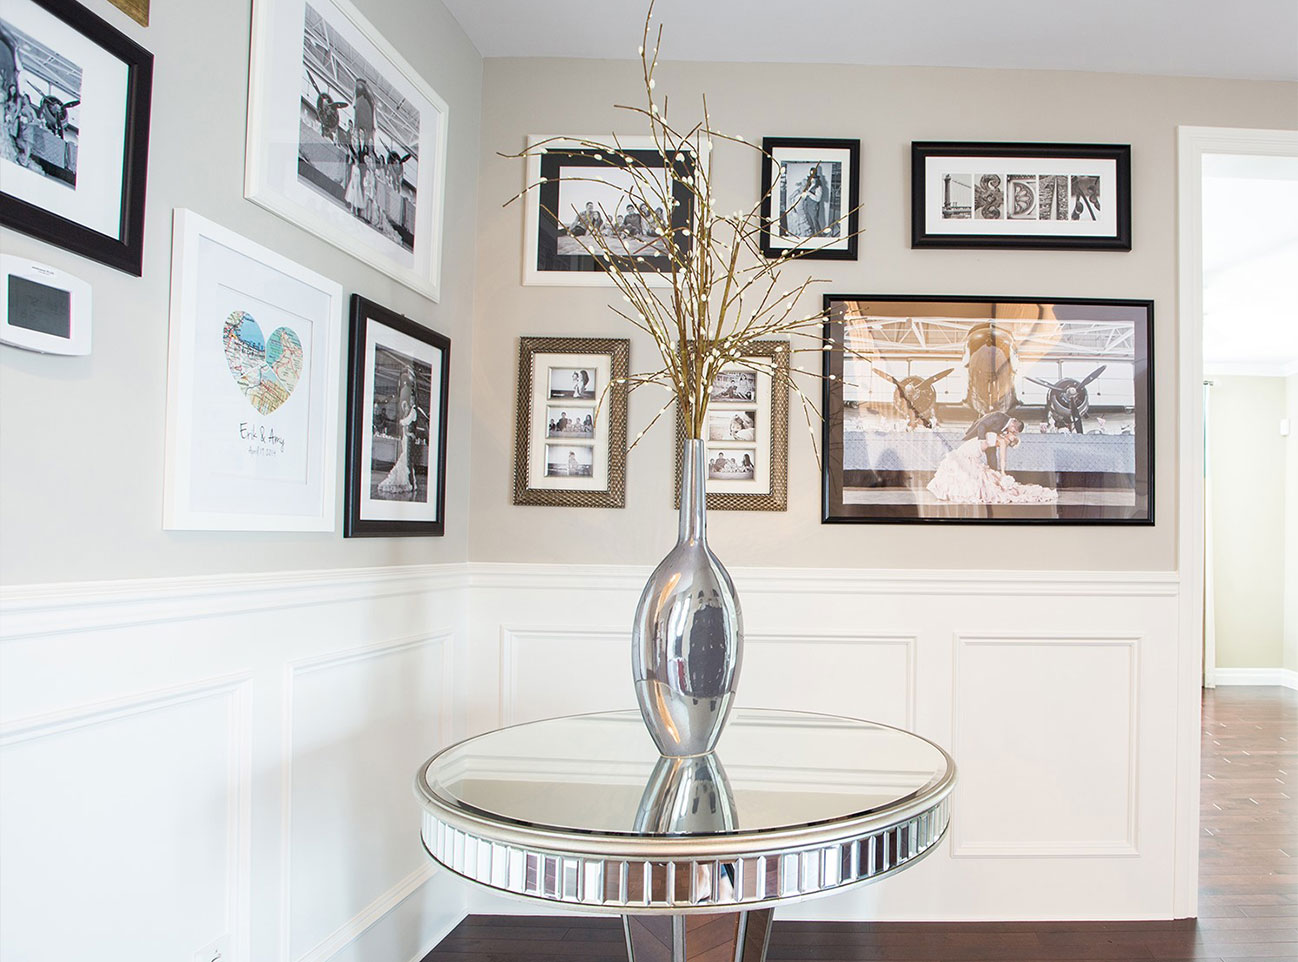
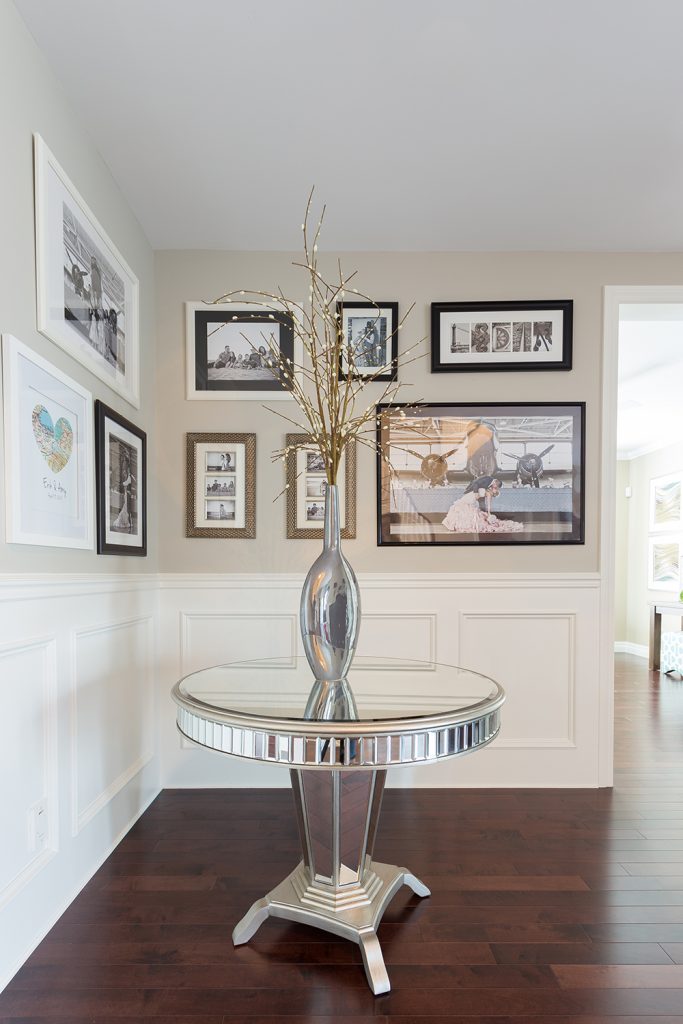
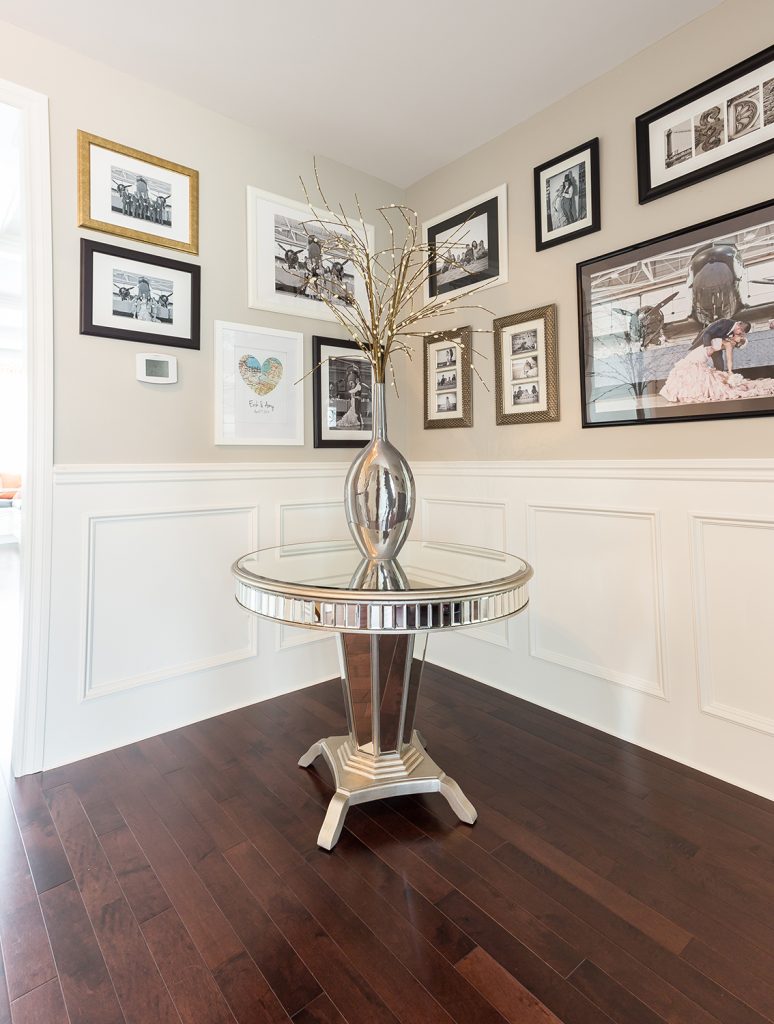
For my client’s front entryway (below) in their home in Hamilton, Ontario, we decided to go with the theme of family photos. We wanted to convey through the images in the gallery, that was is tight knit family with a home full of love and fun! The framed images were from their wedding and trips that they had taken together over the years.
Gallery Wall of personal photos.
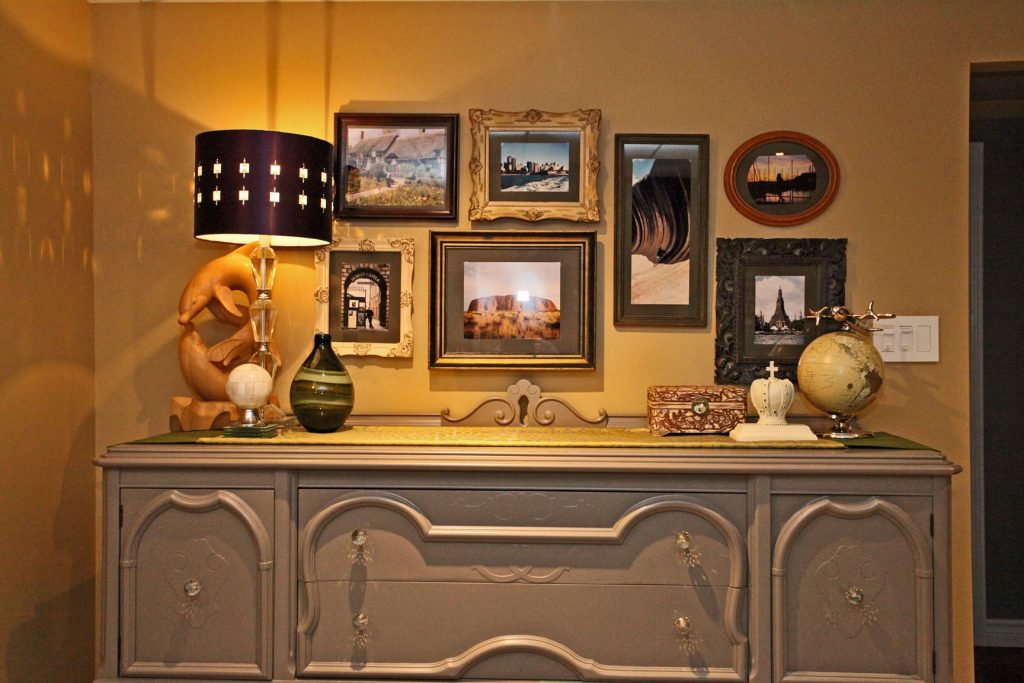
Similar Frames or Mat Colours
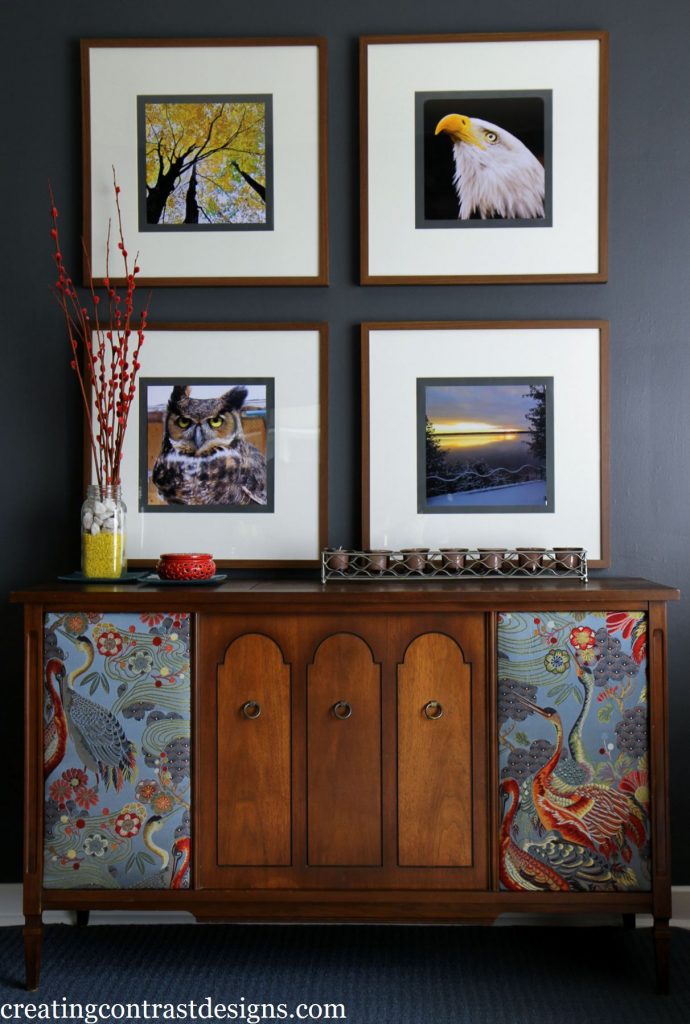
In my own living room in Burlington Ontario, I have a feature wall with IKEA frames that are all the same medium toned wood colour. I also made my own border within the mats to frame each photograph. To keep continuity and flow, I chose to paint them the same as the wall colour, Flint by Benjamin Moore.
Each of our ‘Nature’ themed photos have a little bit of yellow in the image.
Shown below is a wall design that I did in my own basement many years ago. All the mat colours are the same, but you can see that I decided to go with different frames, different in both style and in size.
Photos from our travels, before kids and before we moved back to Canada from England.
Take Your Measurements
Now wait. Don’t put your hammer to the nails just yet!
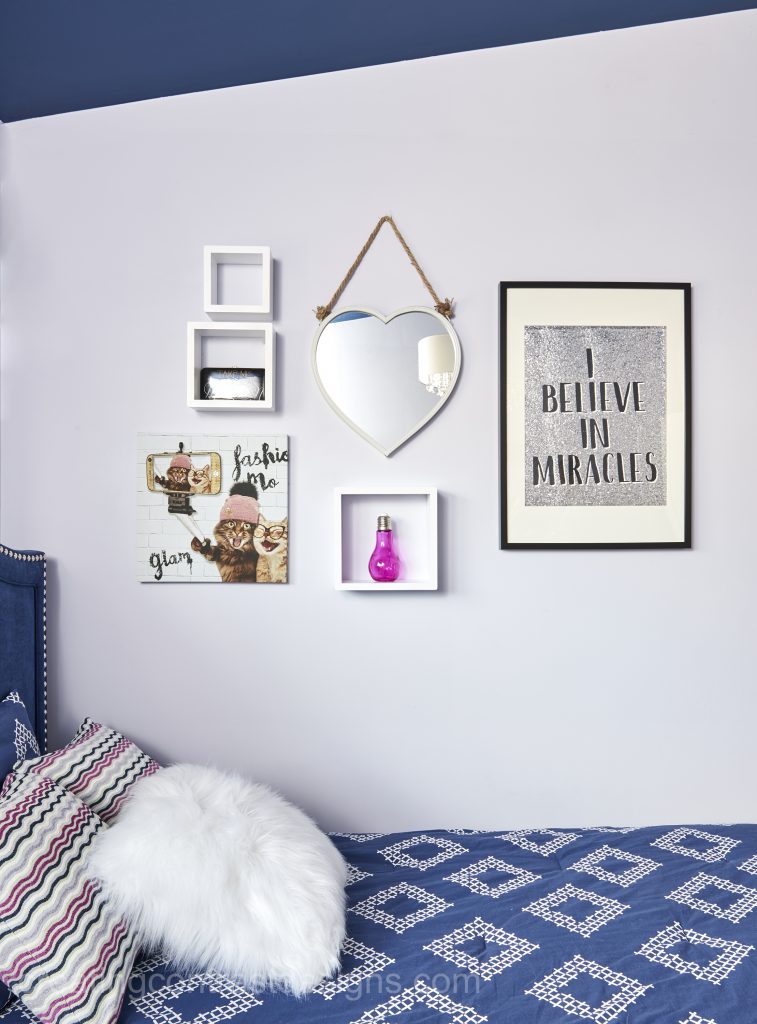
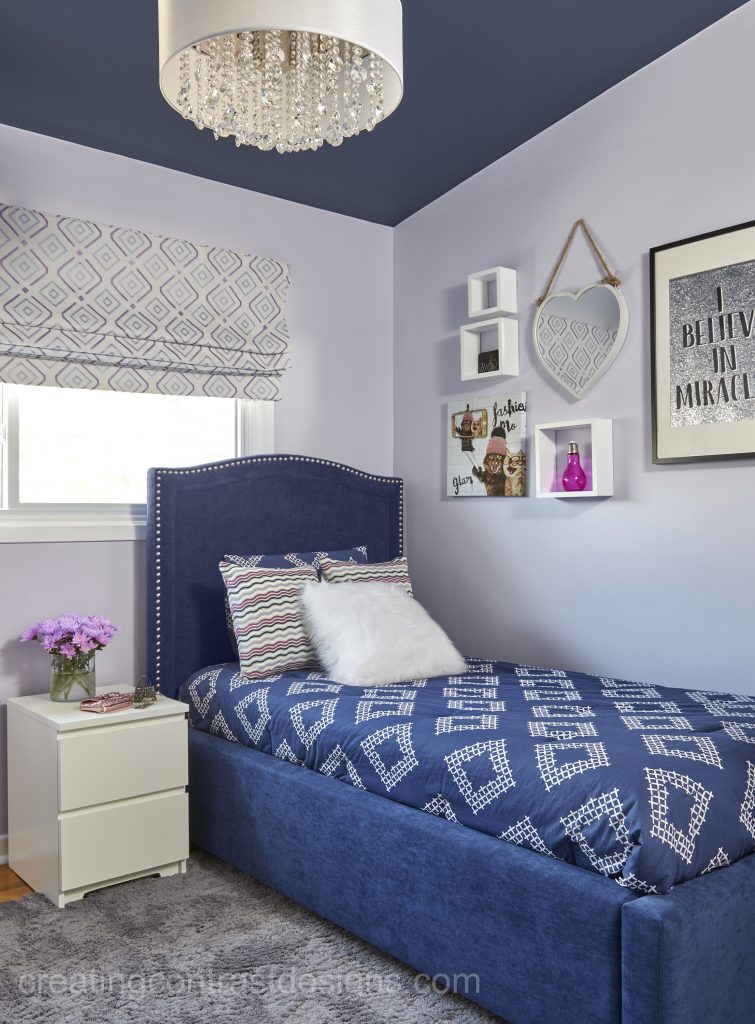
Before you put a hole in the wall, you’ll need to measure the wall space where your wall art will live. Let’s say it’s going above your sofa. You typically don’t want to exceed the width of the sofa. Also, be sure to place the bottom of the frames within 6″ – 12″ above the top of the sofa.
As with anything, there are some exceptions to this rule. However, for the purpose of this post, let’s stick to that way of thinking.
Below in my daughter Elise’s room. Notice how the items on the wall do not extend past her bed?
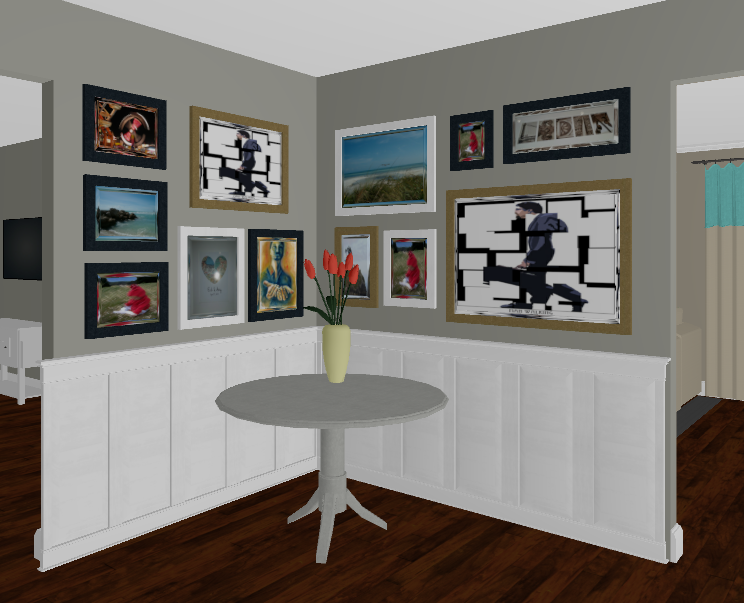
I either use my 3D program and map it all out like you can see in the rendering below. This way I can show clients exactly how I intend to set up their gallery wall display and get my client’s approval for the layout.
The other option is to map it all out on the floor. Use a measuring tape and play around with the arrangement by moving your decorative pieces around until you get the look you want.
Tip: Take photos of proposed layouts before adjusting items to try another look. This way you don’t need to worry about remembering each possibility! (Hey, we aren’t getting any younger, right?!)
I like to start by placing the biggest piece first, unless all the photos are the same size.
You’ll also want to consider if you (or your client) is someone who likes things to be symmetrical or if you are a bit more ‘loosey goosey’ and like the quirkiness of an asymmetrical design.
Symmetrical layout of my clients framed photographs in their industrial dining room we designed.
Keep each piece of wall art close enough together so they’re relating to one another. At the same time, allow for some breathing space so each item can be appreciated when looking at the final design, just as we did above in our clients very cool dining room.
What I love about so many gallery walls, is not only are they a great way to display artwork, but these feature walls are a great opportunity to make your space more personal. That’s really what great interior design for a home is all about.
Just like my tagline states, “Love where you live, live a better life.”
When you surround yourself with personal and sentimental items, that’s when you really make your house, a home.
Plus, you’re going to be excited to show off your beautifully decorated home with those who mean the most to you. A win-win for sure!
If you want help designing a gallery wall, I’d be happy to help. Contact me here.
Now it’s your turn to share your tips with us. Comment below to let us know if you have a Gallery Wall of Art in your home.
“I can’t visualize how my space will look if we take down those walls.”
“I am a visual person & would love to see your ideas for our space.”
“It would be so helpful to understand exactly how our home is going to look before we undergo a renovation.”
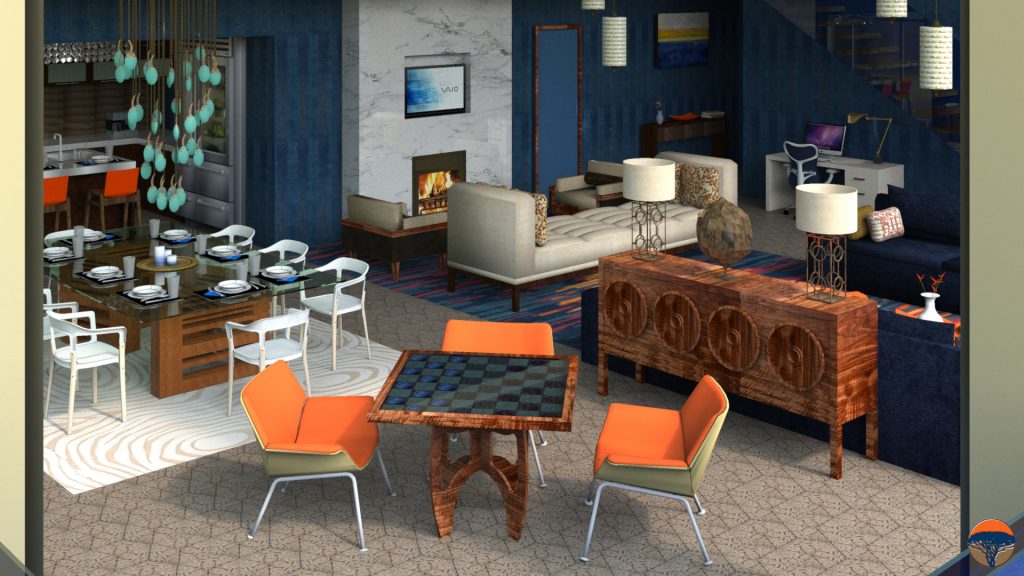
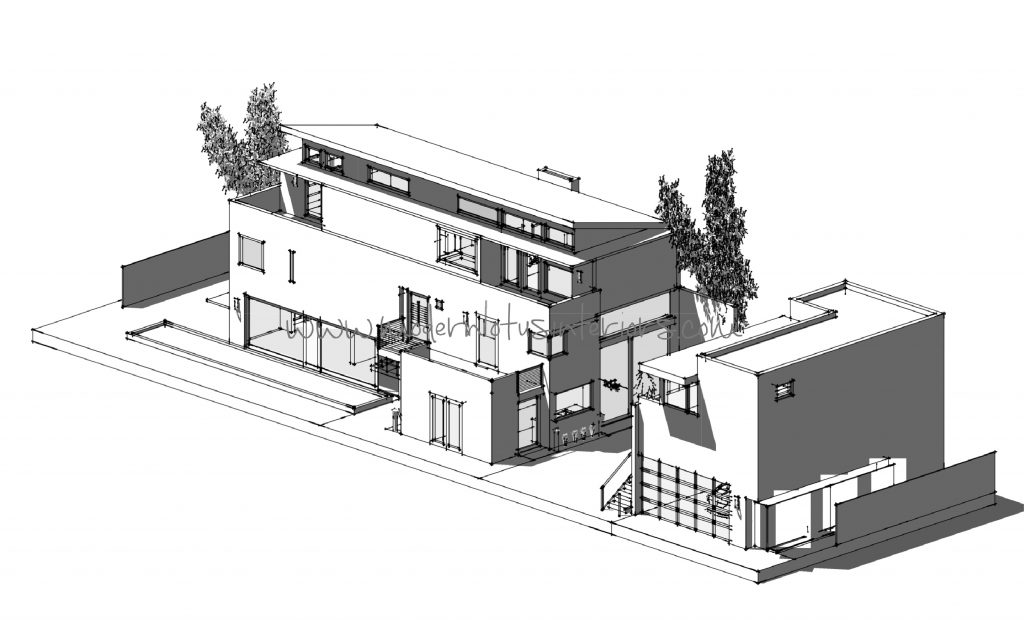
Renderings of a Toronto clients living room. We uploaded sourced fabrics, art & paint colour.
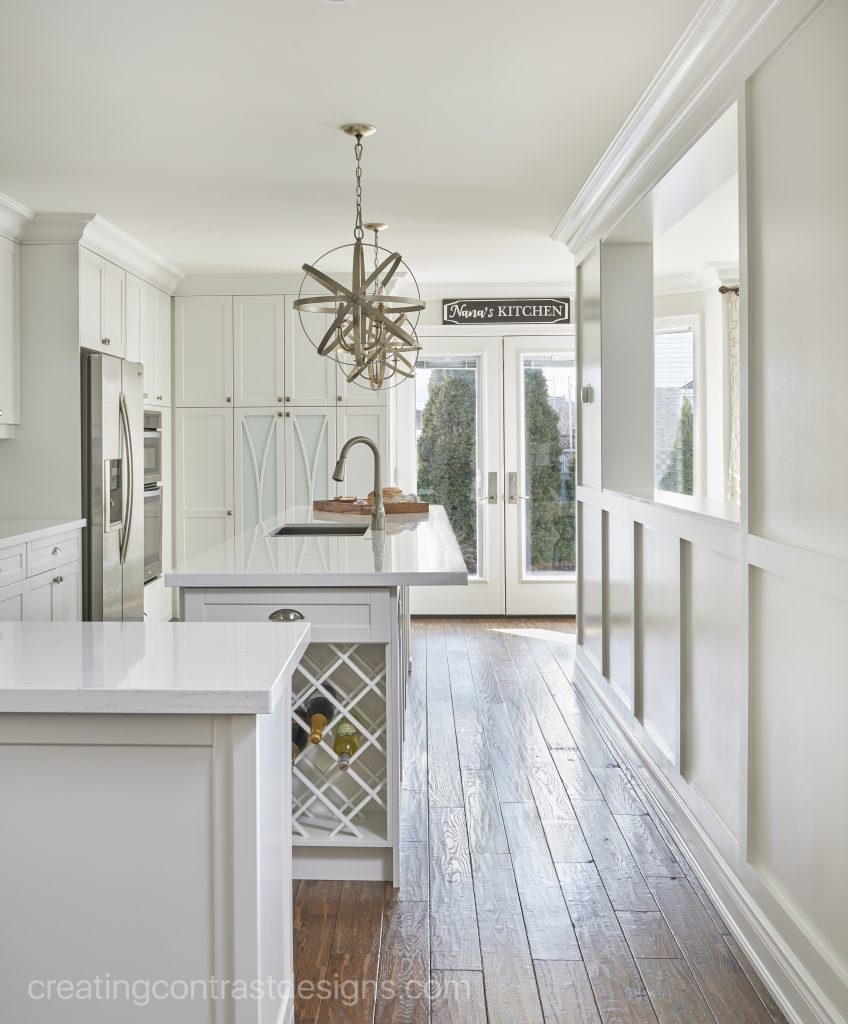
Let me tell you, offering 3D Rendering Services has been THE BEST DECISION that I ever made in my business. Approximately one year in, I was introduced to Chief Architect and I never looked back!
That program –The Design Pro Version – changed my life! To be able to show clients the potential within their space, before they commit to a renovation or decorating project, has been a massive game changer.
Around 90% of my client projects involve rendering services. Whether it’s a full floor or basement redesign, one room or an entire home, we almost ALWAYS provide drawings & concept designs.
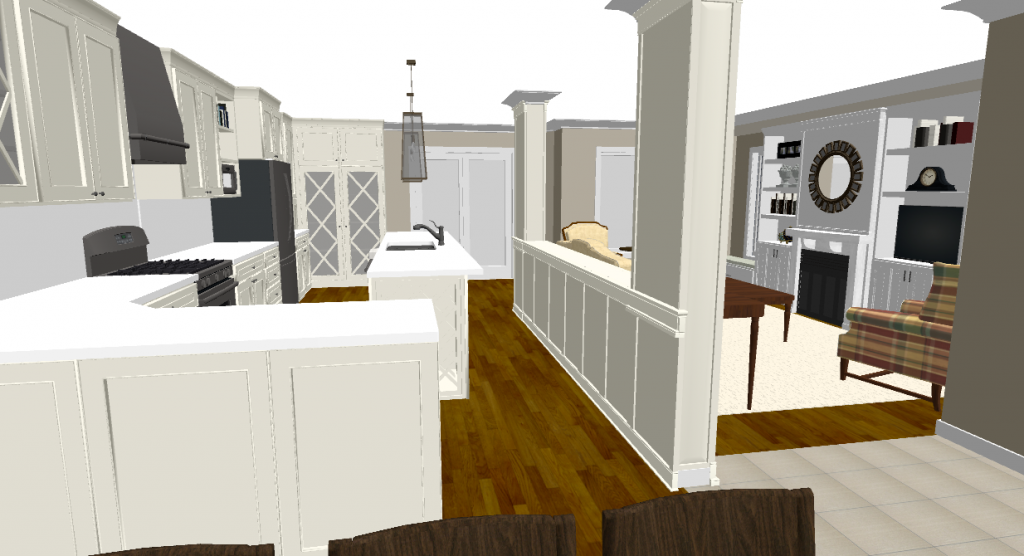
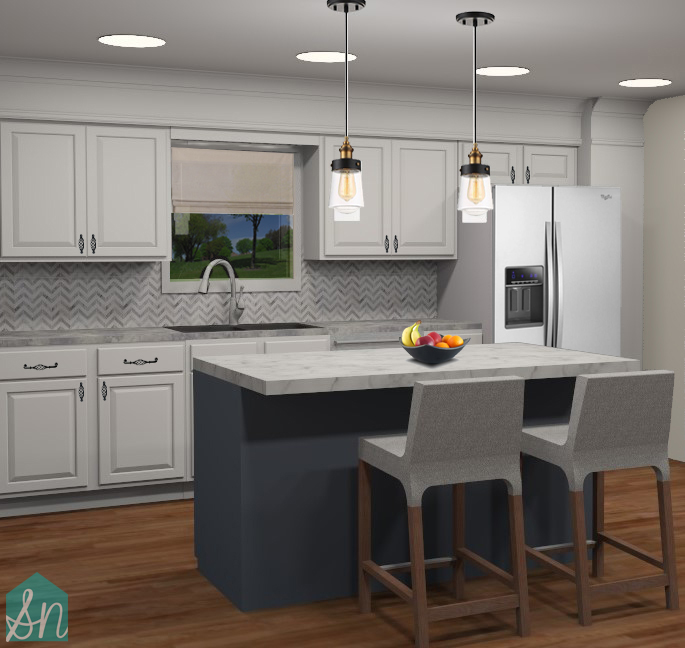
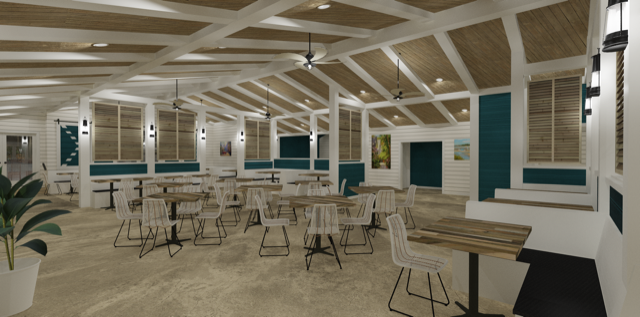
Rendering design where we knocked out a wall & created a pass-through to open up the space.
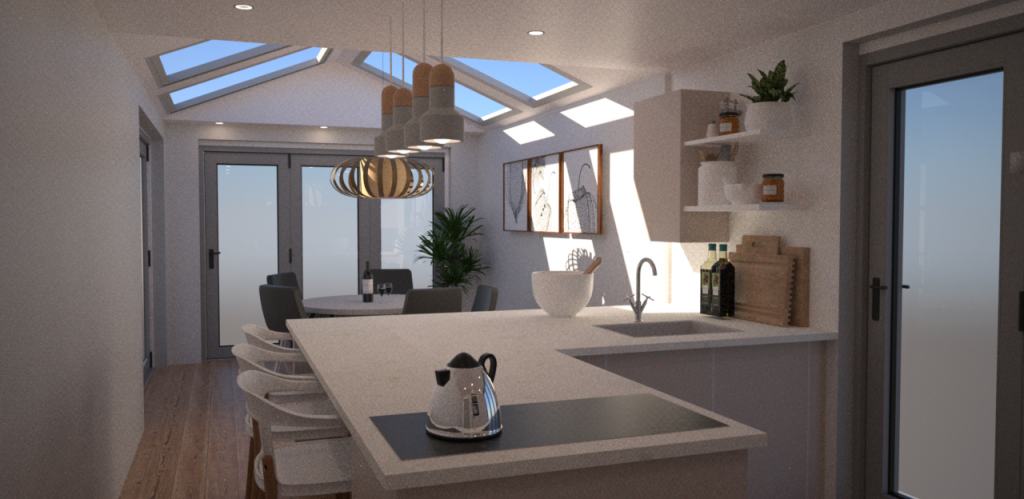
Now it’s true that not all the finishes shown are necessarily exactly what we are recommending, but it’s pretty damn close. If we are unable to show a specific design detail in a rendering, we will sometimes add a moodboard of all finishes and selections we are recommending for a clients home. This way clients can clearly understand our intentions for their newly designed space. See a video here of our clients kitchen below.
Despite the tutorial videos on their website and a very helpful Facebook group called ‘Users of Chief Architect‘ where other users offer support and advice, there is no denying the fact that learning and creating these types of drawings can take a lot of time and patience. As a busy entrepreneur, both of those can be very hard to come by.
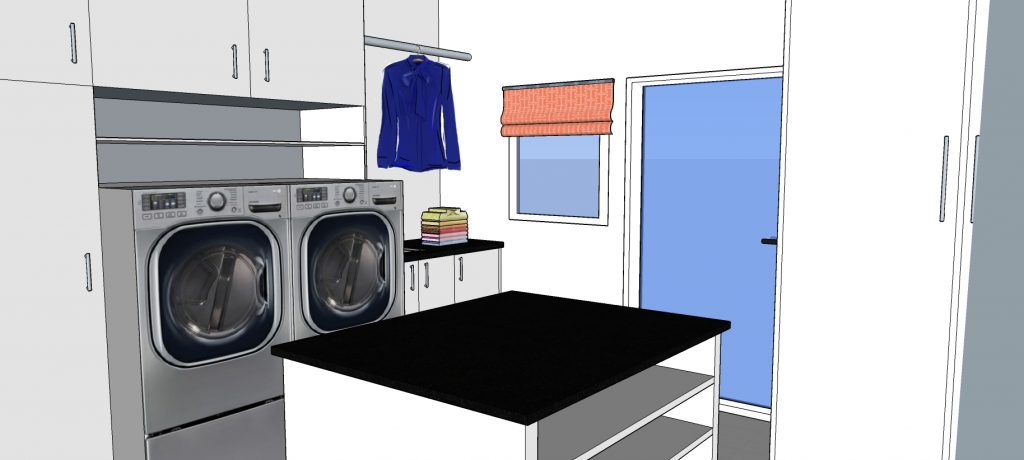
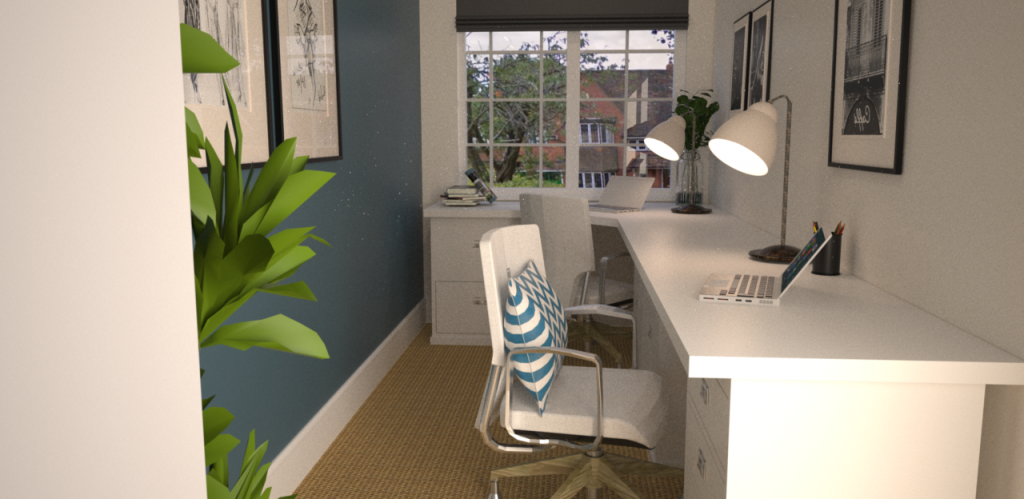
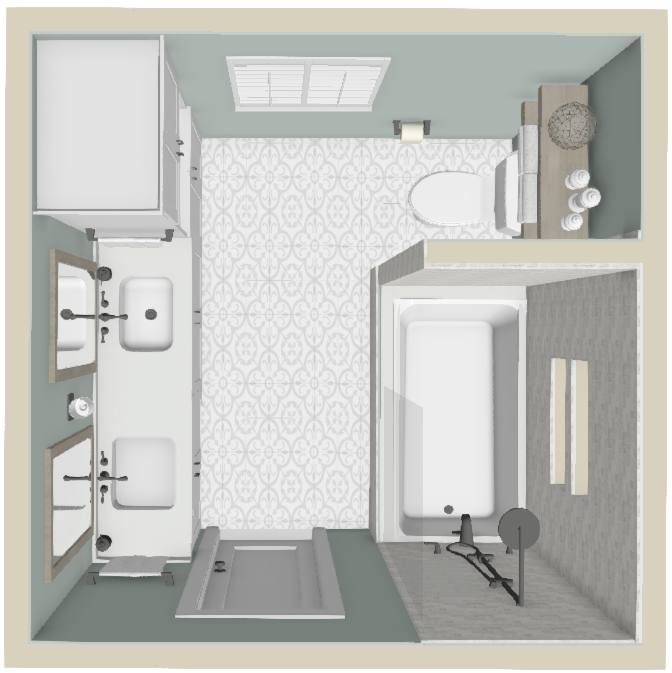
There are many other terrific 3D rendering software programs on the market, each with a different look and with their own pros and cons. My interior design student assistant uses Sketch Up. You can see from the drawing below that this has a different look to Chief Architect.
This is the exact process and templates that we use for our client Power-Point presentations. With 100 testimonials and being the highest reviewed design professional in the Greater Toronto Area, it’s safe to say that we’ve nailed down this process to ensure customer satisfaction for every client. If you want to do the same and get similar results, click here to find out more. Why start from scratch when I’ve already done all the hard work for you?
In my fabulous Facebook group Interior Design Business Strategies, exclusively for Designers; Decorators and Stagers, there are many members of my amazing tribe who offer e-design and space planning services to other designers.
In an effort to help and support others in our wonderful industry of interior design, (which is what I’m all about in case you didn’t already know!) below I am sharing some of these helpful designers resources and contact information.
Please note that I have never personally hired any of the design professionals listed below, nor can I testify to the quality of their services. I am not receiving any sort of affiliate or commission for sharing their details either. It is purely as a resource in case you are looking to outsource this service within your own interior design business.
Please do your due diligence in vetting perspective opportunities for work collaborations, just as you would with any sub contractor or trade. Additional services and pricing information can be obtained by contacting the designers via their websites, listed in each of their profiles.
Note: Prices listed as of the date of publishing this post, April 2018.
Renderings Resource List
Staci Nugent
Company:Staci Nugent Design Area of expertise: Residential 3D Renderings, Concept & Mood Boards, Floor Plans & Elevations, Product Sourcing, Creating Presentations & Photoshop. Rendering Program: Sketchup Education/Certificate: Bachelor of Arts in Interior Design Starting price: Basic Package is $195 USD for one layout/view & one revision with up to three changes. Designer provides all sources.
Area of expertise: Residential & Corporate 3D rendering, 3D Walkthrough Videos, Concept Presentation & Mood Boards. Rendering Program: Sketchup Education/Certificate: 15 years industry experience in residential and corporate interiors Starting price: $115 CAD (more details found on website)
Area of expertise: Commercial; Residential; Kitchens/Baths; Full Homes ;Concept only with Space Planning; Permit Ready Drawings and Moodboards Rendering Program: SketchUp & hand drawings Education/Certificate: Fullerton College, AA Degree; Master’s Degree in Interior Architecture Starting price:One room starts at $65/hr, with a 10 hour minimum. Entire homes dependent on size.
Area of expertise: Residential; Kitchens/Baths; Full Homes; Concept; Space Planning & Mood-boards Rendering Program: SketchUp Pro and Indigo Render Education/Certificate: 2 x Interior Design Diploma, 1 x Certificate and 1 x BA Hons Starting price: One room $340 USD
Company: Kelly Fridline Design LLC Area of expertise: Commercial & Residential; Kitchens/Baths; Full Homes; Concept only with Space Planning; Permit Ready Drawings; Moodboards etc Rendering Program: Chief Architect (capable of hand renderings too) Education/Certificate: Master of Architecture, Savannah College of Art and Design (IDP completed) Starting price: $75 per hour. The time/price is dependent upon level of detail, requested updates, and turn around requirements.
Company: Silvia Karounos Decor Studio. Area of expertise: Commercial; Residential; Kitchens & Baths; Full Homes; Concept only with Space Planning ; Drawings & Moodboards Rendering Program: Sketch Up and Podium V.2,5 Plus. Chief Architect and PowerPoint Education/Certificate: Interior Design Diploma (Brazil), Certificated Interior Decorator (QC Design School)
Starting price: Up to 300 sq.ft. Sketch Up rendered image with 1 revision $180. SketchUp and Podium rendered image $250. Panoramic rendered image $350. Drawing floor plan and Moodboard: $80 per image. All pricing is in USD.
Company: Key Light Render Studio Area of expertise: Residential; Kitchens/Baths; Concept only with Space Planning & Moodboards Rendering Program: Chief Architect Interiors Education/Certificate: Interior Design from University of Northern Iowa Starting price: $100 USD per space, UP TO 4 standard rendered images. A-la-carte menu for photo-realistic images, panoramic images, mood boards, 2D floor plans, or additional standard rendered images over the 4 allotted images.
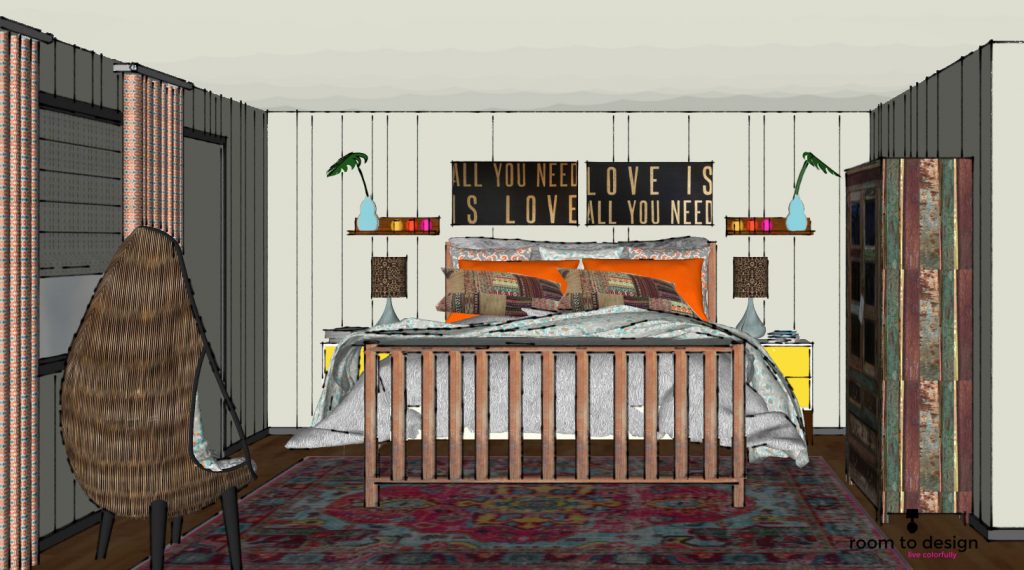
Company: Room to Design Area of expertise: Residential; Kitchens/Baths; Full Homes; Concept only with Space Planning Rendering Program: Sketch-up Education/Certificate: AA Interior Design Bellevue College, Bellevue Washington Starting price: $375/ room USD
If you are looking to outsource this service, hopefully you can hook up with one of these interior design professionals. Collaborations like this can definitely be a win-win for everybody. Outsourcing tasks that you don’t have time for or that you simply don’t enjoy doing, is key to running a successful interior design business.
Comment below if you use a rendering program and let us know your favourite software. This is always a hot topic of conversation in our community, so please share this post with others who can benefit from learning more about these ‘To the Trade’ services.
Want to elevate your biz & get more of my ‘No-Nonsense Advice For Running Your Successful Interior Design Business’? Click here and you’ll also get my Design Packages and Rates template for FREE, along with my coaching sheet & video.
I think there is a romantic idea about being an entrepreneur, especially as an interior design business owner. No one sees the hard work you put in.
The focus tends to be Instagram-worthy after photos, unless you share ‘behind the scenes’ on site in your IG stories. (which I highly recommend!)
When you tell others what you do, the response, “Oh that must be so fun!” is not uncommon. Am I right? You know you’ve heard that one before!
But honestly, running an interior design or decorating business can be tough. Don’t worry though, I’m here to help you!
The Business Start-Up Checklist is a good place to start in understanding what you will need to run your business.
Now to see my highest viewed Coaching video, ‘How To Run An Interior Design Business’, click on the video below.
1. Determine What Services To Offer
With every client project and experience, you’re going to quickly find out what you love about the interior design business and what you’d rather not do.
As your business gains traction and you make more money, outsource the tasks you don’t enjoy or simply remove them altogether as a service you provide.
For example, I used to do all our renderings and concept designs for clients. Now I outsource this task so I can focus on other aspects of the business that I love, like meeting with clients; curating beautiful designs and making videos!
Either way, make sure you know what services you’re going to offer. This way you can confidently explain not only what you do, but also the benefits of working with you.
I like to have a Discovery Call with every potential client and then an initial consultation to make sure everyone is a good fit for the proposed project.
2. Helpful Resources & Design Tools
You will need to invest in some key design tools for your business. This will rely heavily on my first point listed above in terms of knowing what type of services you are going to provide.
For example: Software for creating 3D renderings, large colour boards, an accounting system, an intuitive project management system and anything else you need to work efficiently and effectively.
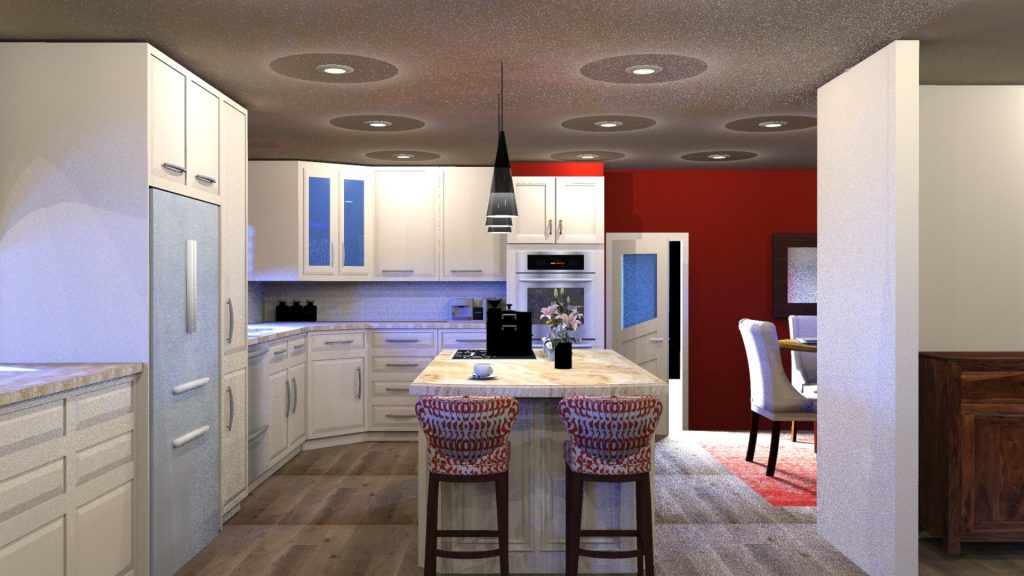
3D Software Program
See how fabulous this room turned out in real life here
Clients living room in 3D using Chief Architect, Design Pro. By Claire Jefford
Project Management Software
Mydoma is the premier platform for interior designers who want to spend less time managing, get paid faster, grow their business, and get supported by an incredible community while doing it.
Watch the video below for more information on how it works.
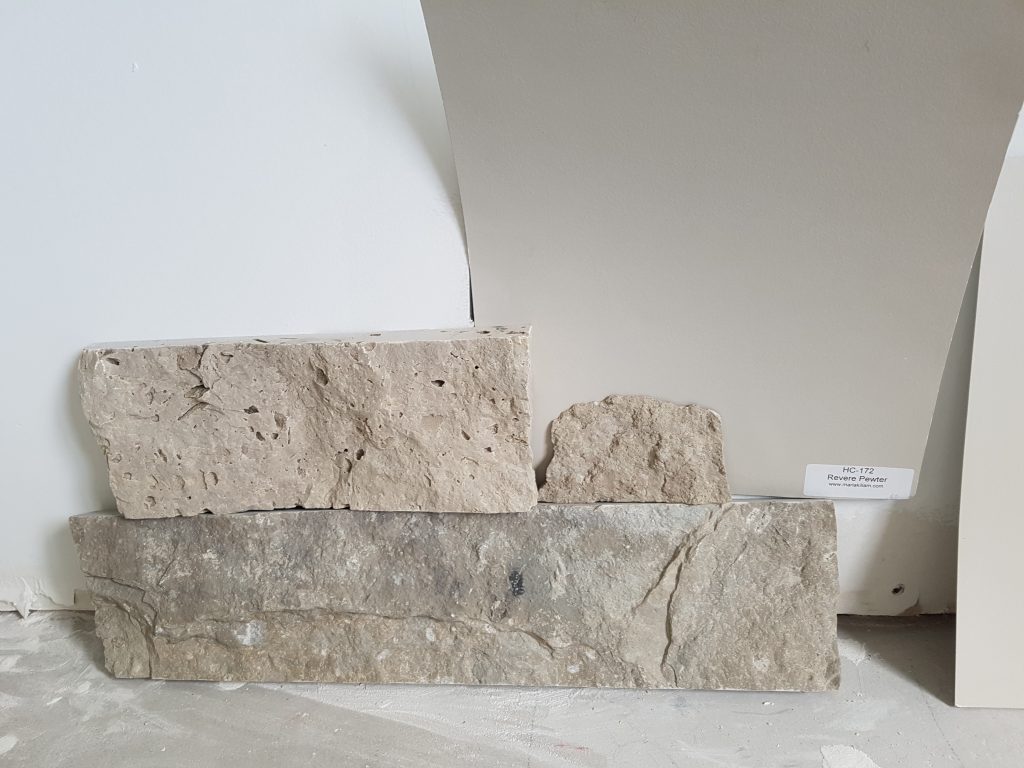
Large colour boards have been another huge asset for my business. They make it easier to choose the right paint colour and I can show clients why I recommend one colour over another colour.
I take my large paint boards to every meeting and confidently specify paint colours.
Materials to Hand
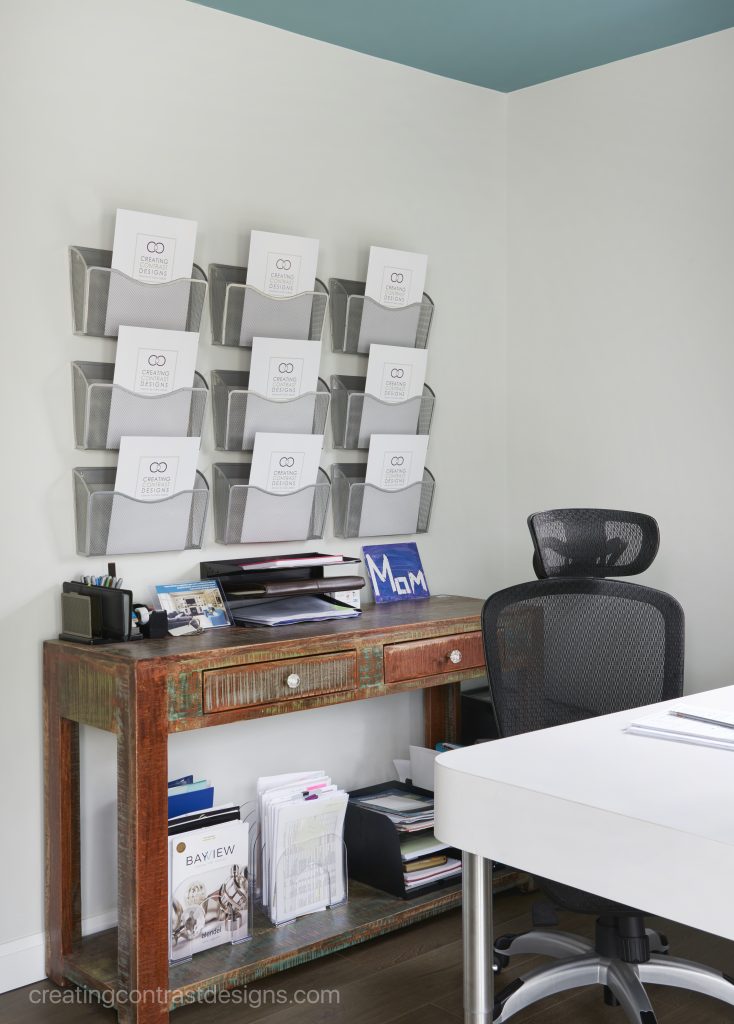
In my office I have a small library of fabric and wallpaper books; brochures & catalogues as well as many samples that I am able to reference as needed. I can also bring some of these items to clients’ homes to be best prepared for the initial consultation meeting, depending on their needs.
Go check out ‘What’s in my bag‘ to see contents of what I might bring to a consultation.
Sure, Interior Decorating and Design can be fun, but there is a lot that you need to know and keep track of!
You MUST be organized and professional with your onboarding process, tracking inquiries, sourcing and placing orders, customizing designs and much more.
Having a background in Human Resources has served me well in this area, I actually thrive on being super organized! If you hate coming up with wording for email and making checklists and forms, or creating a process flow chart, let me help save you a ton of time with my proven processes.
With more than 20 forms/templates/checklists to download; 7 pre-drafted emails and 3 videos, it’s full of so much invaluable content that is already done for you. All you have to do is add your own branding such as logo and font colours!
Stop re-inventing the wheel with every new client or worse, flying by the seat of your pants and making it up as you go along!
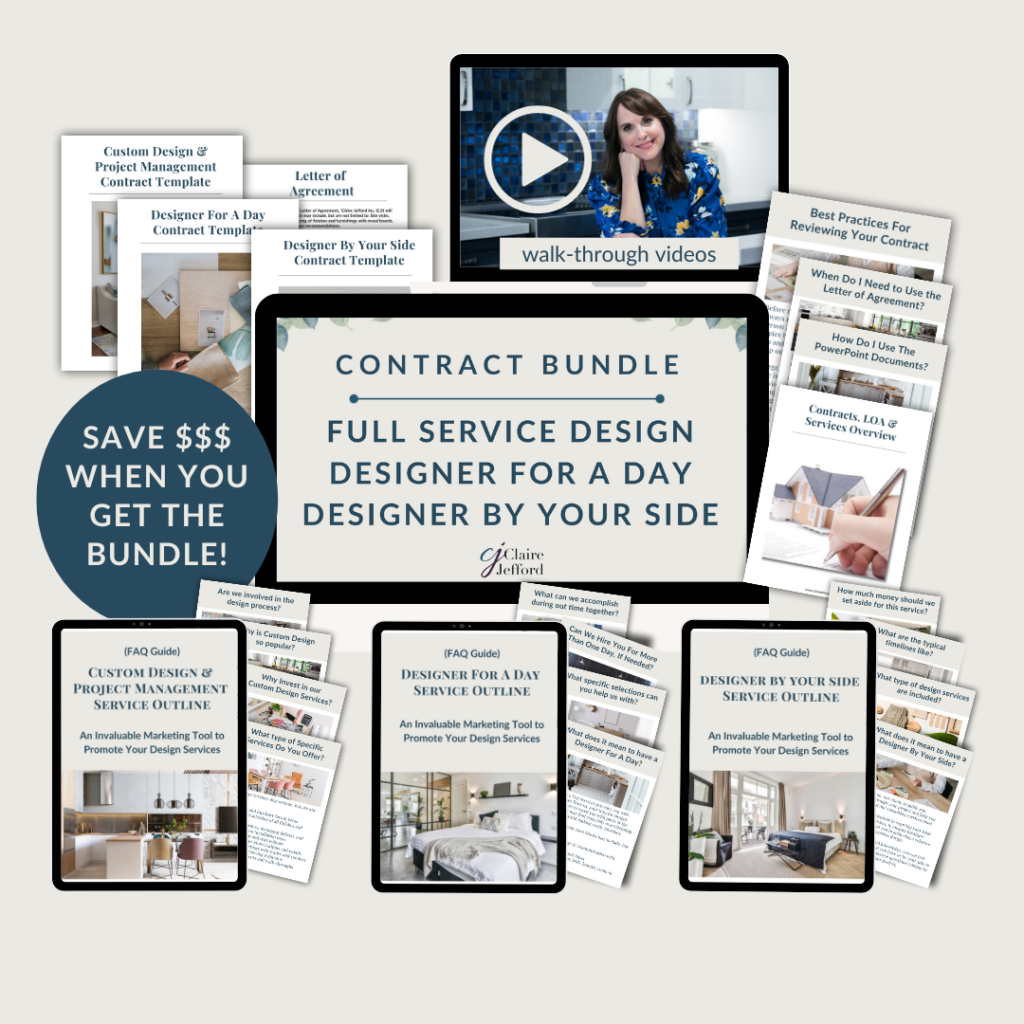
As part of your process, DO NOT underestimate the importance of having clear and thorough contracts. Learn more about my Contract Templates, they are available now and for immediate download.
4. Establish Relationships with Quality Tradespeople
One huge benefit that you will serve to clients, is as a resource to quality and trustworthy trades.
Customers will want to know that they can rely on you for recommendations of great referrals such as builders, general contractors, painters, plumbers, electricians, and anyone else who might be required to carry out work on a renovation or decorating project.
Will you happily pass along their details and have clients liaise with them directly?
Or, will you oversee each project while scheduling, managing and collecting payment for all of the trades?
If you haven’t heard my podcast episodes with 2 of my contractors, you’ll want to take a listen here.
I personally don’t love project management. Therefore, we happily recommend trades to clients, but typically only to clients who have hired us for ongoing design services. Good trades are hard to come by, so do your homework and be clear on your working relationship.
Bernhardt Showroom, Highpoint Market.
You will also need to set up accounts for vendors and suppliers for various products such as plumbing fixtures, appliance, flooring, tile and furniture. When you’re attending trade shows, build your relationships with local vendors to make purchases.
If you haven’t been to a furniture trade market and you offer custom decorating services, click here to get insider tips from other designers’ on how to navigate the showrooms and plan your trip.
5. Plan Your Marketing Strategies
In today’s busy world, you will want to be promoting yourself through social media platforms, as well as with face-to-face interactions in your local community. (Unless you will be focused only on E-design).
No matter what services you choose to offer, you will need a solid marketing strategy in place so people can find you to understand how you will save them money and how you can offer so much value to a project! This is why having a great online presence and strong relationships with others in the industry (both on line & in your local community) is imperative.
Video is one of the best tools for connecting with and speaking directly to your ideal clients.
With Facebook Live and Instagram stories, however, it couldn’t be easier to hit the record button and share what you have to offer with the world! And because what we do is so visual, there’s a ton of content ideas that we can share on a daily basis.
Physical promotional materials are perfect to pass onto with trades, suppliers, friends, neighbours and clients. See here for the brochure that I created to showcase my services and learn how I use it in my business to attract new clients.
6. Build your reviews
Ask your happy clients for a testimonial after the project is finished. Businesses are often successful because of repeat business and referrals, and our interior design industry is no different.
I used to ask for reviews on Houzz as I get a lot of my business from that platform. But over the past couple of years, I have turned my focus to Google for getting reviews and it’s paying off.
Then be sure to SHOUT ABOUT each review and share in your social media posts.
I appreciate that Houzz is not very well-liked in our industry, so you will need to consider which platform you wish to align your business with and where you end up getting most of your online traffic to your website from.
You are in business to make money. Sure, this business is our passion, but it’s still a business.
What are you going to charge? How are you building multiple revenue streams? Are you making commissions on furniture sales?
In running your interior design business, you will find that you have a lot of outgoing expenses. Everything starts to add up fast and it’s mandatory for you to be making a profit at the end of the day. This doesn’t make you greedy, it makes you a smart business owner.
You may very well be leaving money on the table, when you should be charging for your time and invaluable knowledge.
In this video I show you how you can make more money…like up to $25,000 or more per year!! Yeah, you don’t wanna miss that, it’s a game-changer.
Want to take your business to the next level? Here are a couple of more ways that I can help.
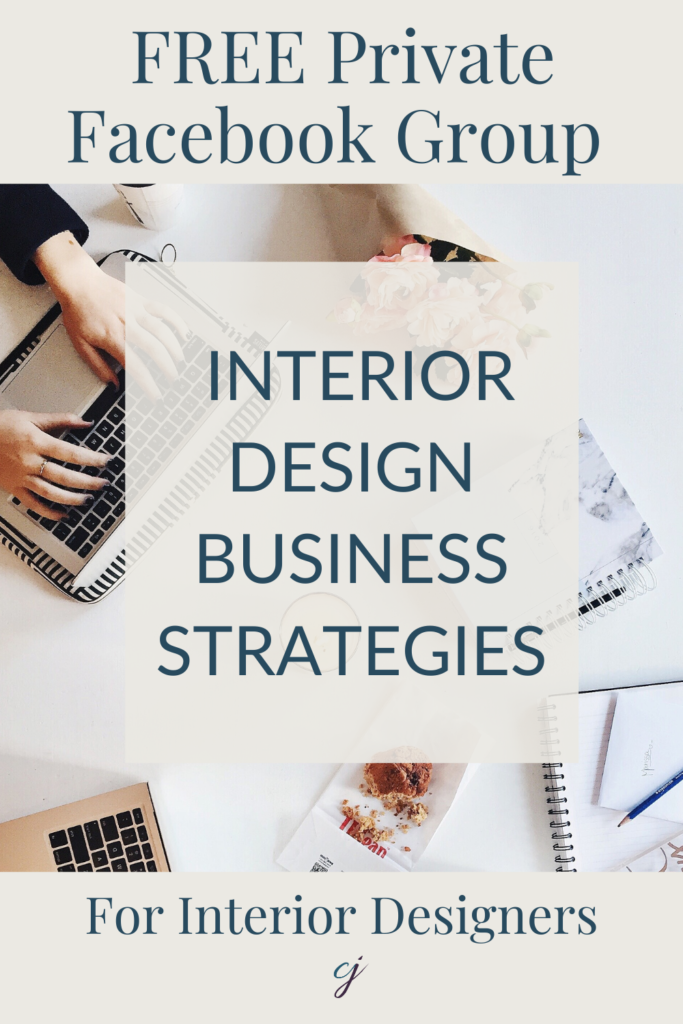
Join my FREE Facebook Group – Interior Design Business Strategies. IDBS…where there is no BS. It’s a supportive, highly resourceful and incredible group of talented designers from all over the world.
The engagement is unparalleled and people are sharing so much, every single day. Click here to request to join my tribe and be sure to answer the required questions to be considered for approval.
What else do you consider important in terms of running an interior design or decorating business? Comment below, tell me what you think!
Please note: some links on this page are affiliates and therefore earn me a small commission should you choose to purchase a product or sign up to a program. There are no extra fees incurred at all. Thank you for your trust and support.
Before I take on any new client, I recommend having an initial discovery call first. This phone call gives you the opportunity to get to know the needs of a potential client and figure out if you are a good fit for one another.
This discovery call will also help to identify possible red flags, which is another good indicator as to whether or not it’s the type of client or project that you wish to take on.
BUT!! Before we dive into my post with video, I’ve got something that may be of serious interest to you.
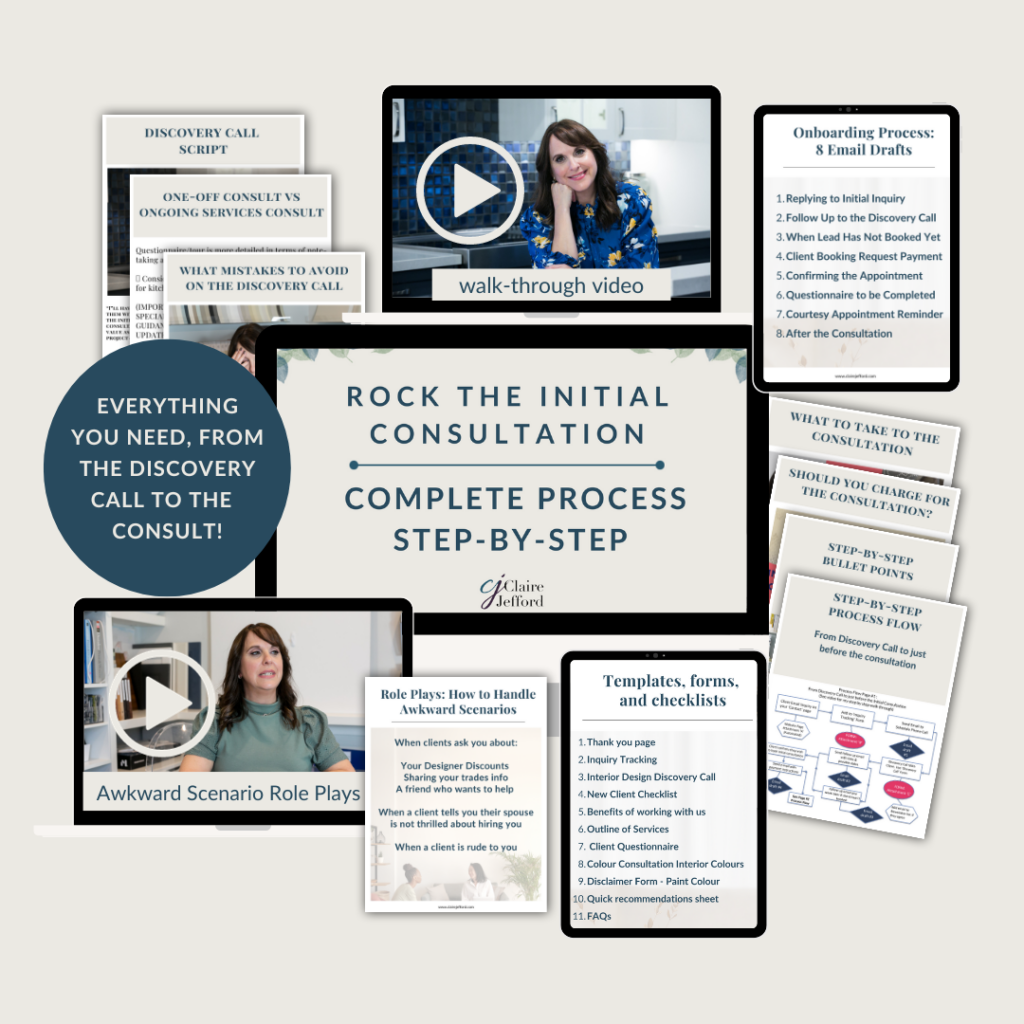
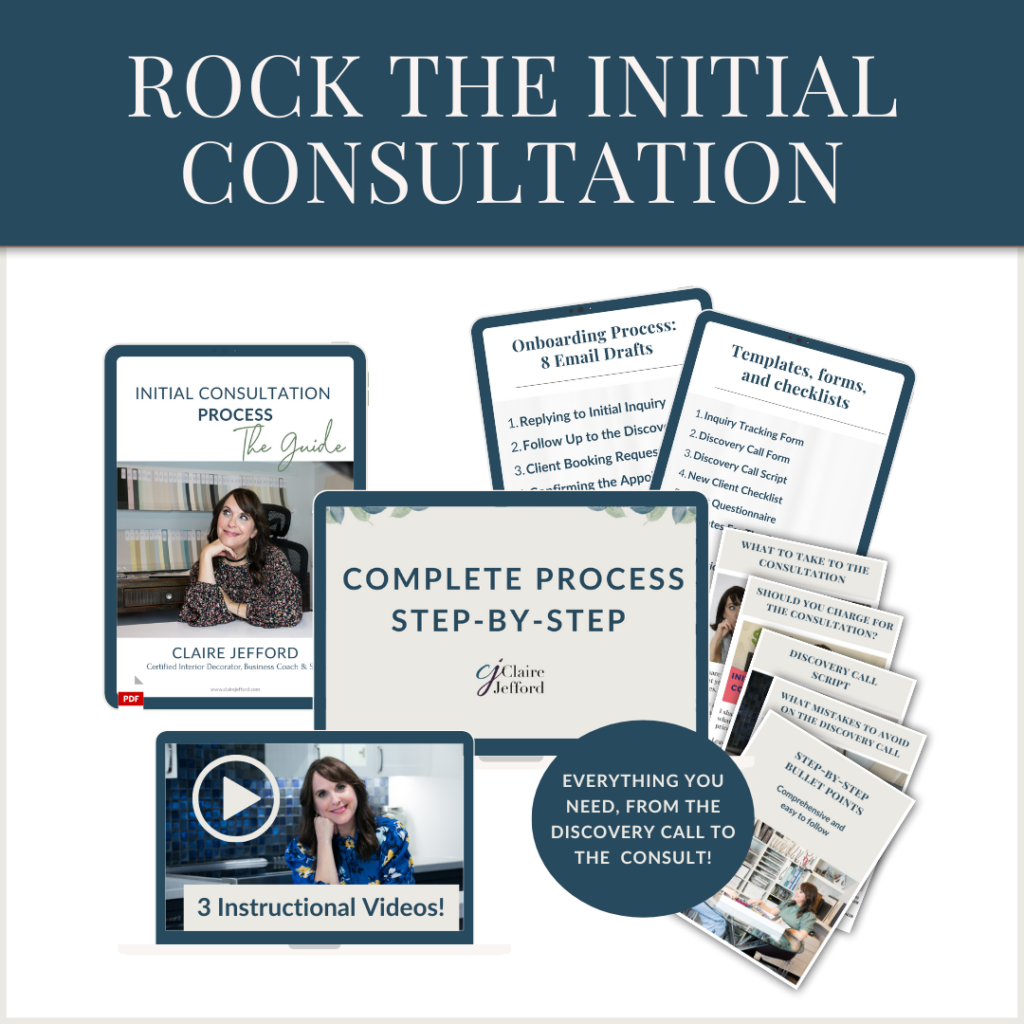
If you want to tighten up your processes, ROCK the Initial Consultation AND see a video of how I conduct a discovery call, as well a consultation meeting, listen up!
Do you feel like you’re flying by the seat of your pants & re-inventing the wheel with every new client project you take on?
Are you lacking organized processes that are essentially holding you back from converting inquiries into clients and client consultations into design projects?
Would you like to feel more confident when communicating with potential clients on the discovery call and in the initial consultation meeting so you can charge more?
Get ready to make things happen in your business, because I can help! I’m so freakin’ excited about this because I know it’s going to be valuable for so many in our industry. To buy now, click here.
This is ideal for you if you are a student; in the early stages of setting up your business or thinking about starting your interior design or decorating business.
Okay, here are the 5 questions I ask on the initial call:
1. Where did you hear about me?
Always take notes to log the date of the call; where the person inquiring about your services found you & if they booked an appointment for an interior design or decorating consultation.
This data will help you keep track of each inquiry in order to determine any patterns or consistencies. You will also want to use this information to know where to focus your future marketing efforts and understand which platforms are working the best for you.
2. Where do you live?
If you have a location-based business like I do, this is very important. I don’t like to stray too far from my interior design studio here in Burlington, Ontario. If a potential client lives over 25 – 30 minutes away from me, I’ll factor in a time allowance for travel/gas/wear and tear on my vehicle etc and advise them of this rate, which is in addition to the initial consultation fee.
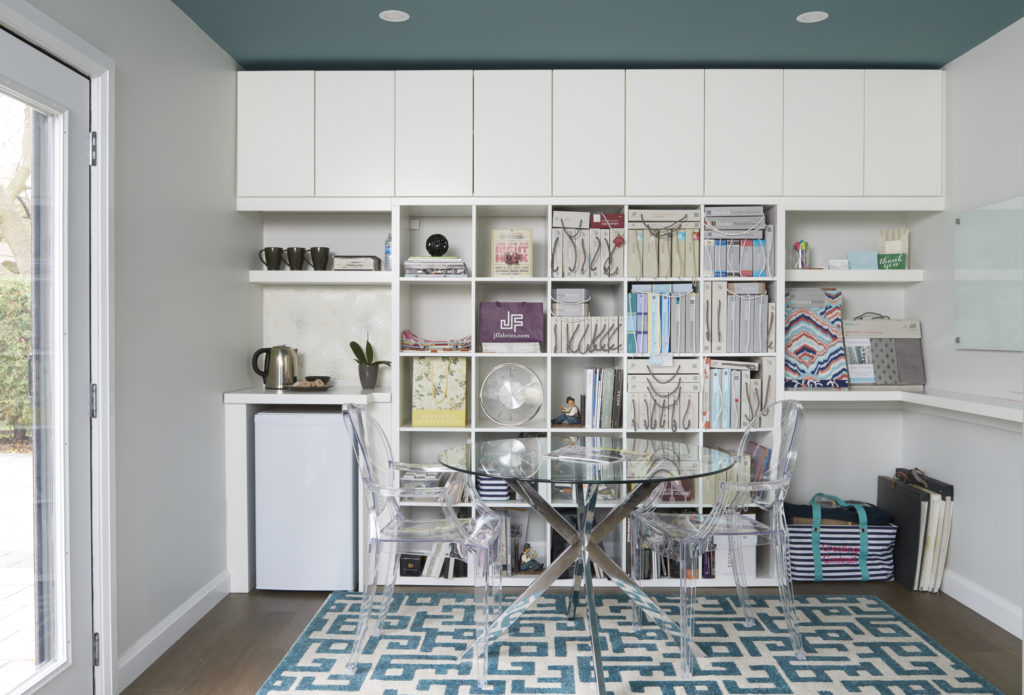
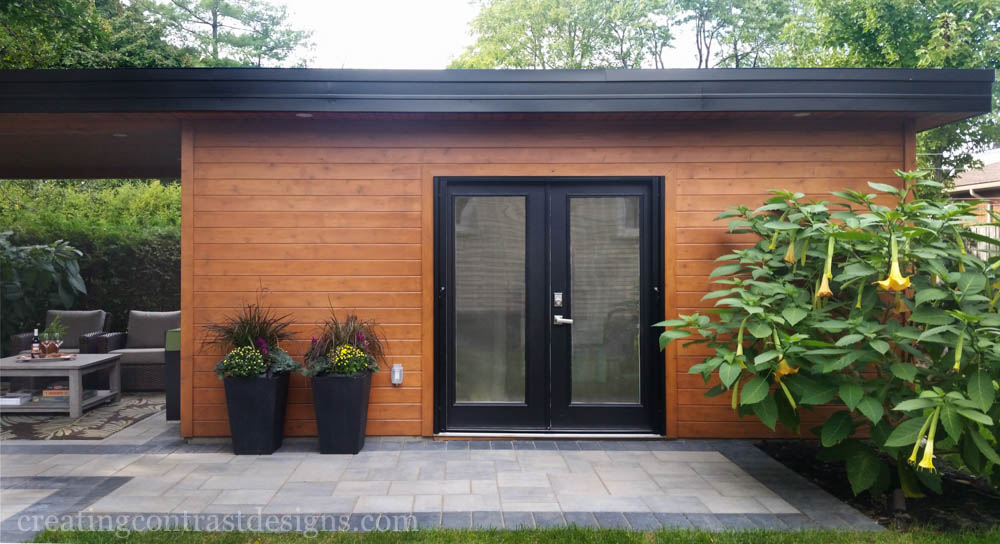
My outdoor studio.
Always be upfront with your processes and rates, then people can decide if they still want to work with you and pay the extra costs.
If this is important to you as well, be sure to ask this question before getting into too many details about the project.
If a potential client is out of my service area, I can almost always recommend another design professional who can help. It’s nice to refer business to other colleagues you trust, so I find that this is a win-win for everybody.
3. What are your timelines?
Asking about timelines can reveal so much about a potential client and their expectations. When asked this question, if the response is that they are already in the middle of a project and things are getting crazy with all the decisions they need to make, you will then need to decide if that is the type of situation you want to be walking into or not.
Personally, I prefer not to take on projects where homeowners are in a panic and have tight timelines for making decisions. There are of course exceptions and you will need to go with your gut instincts.
Another element to consider is that if you make yourself available too soon, you could be setting the tone and their expectations going forward, should they decide to hire you on for further services.
When homeowners recognise the importance of having a plan and they understand that things take time, that is music to my ears!
I highly recommend understanding and setting their expectations from the beginning. Don’t let someone else’s lack of proper planning become your red alert emergency.
4. What is your budget?
It’s not uncommon for most home owners to either underestimate the price of a renovation project or be completely oblivious to realistic costs. (We mainly have HGTV to thank for this!)
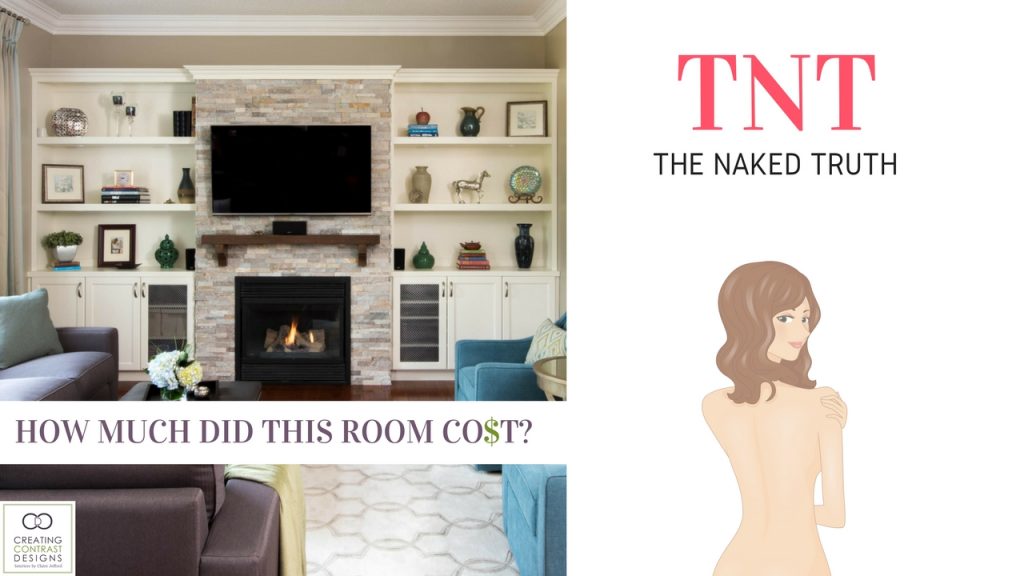
If a potential client doesn’t have a realistic expectation of what things cost, have an open conversation with them early on. Never shy away from talking about their ‘investment amount’ because it’s imperative to know this in order to successfully plan, source and manage their expectations going forward.
I like to send clients one of my ‘Naked Truth’ videos where I highlight all the costs of a custom decorating project. This gives them a very good idea of what type of investment we are looking for them to make, should they wish to work with us on our Elite Decorating Package.
During the initial consultation, you can provide them with ideas of costs involved for their specific project. I like to break it down by room or by items for purchase and give ranges of pricing as opposed to throwing out one ‘ballpark’ figure.
If you aren’t sure about costs yourself, it’s fine to let them know that you need to review their ‘wants’ list and possibly even speak with your trades before you can get back to them with estimated pricing.
5. Have you worked with a designer before & do you have trades & suppliers already lined up for the project?
You will want to know if a potential client has previously worked with a designer and if “it didn’t work out”, this may be a red flag.
If they have worked with an interior design professional, ask for feedback about the dynamics of that relationship and really listen to the answers to establish if there is a pattern or if they simply were not a good fit.
I also like to ask if they have specific contractors or buyers that they want to use on the project. This helps me to understand the level of involvement that they may be seeking in terms of design assistance.
If they already have active supplier and/or furniture accounts, you will need to decide whether or not this is the way in which you want to work with clients, knowing that there may be little to no room for making commissions on products.
Some designers prefer to bring in and manage all of their own trades on a job, while others are happy to work with a clients’ contractor. If you choose to work with trades that you are not familiar with, be sure to state in your Letter of Agreement or contract that you will not be liable for their work and clearly state how you will communicate with them for details of the project.
The discovery call is a great place to begin a new client relationship. Make the most of your call by asking the right questions.
What other questions do you like to ask on the initial phone call with potential interior design client?
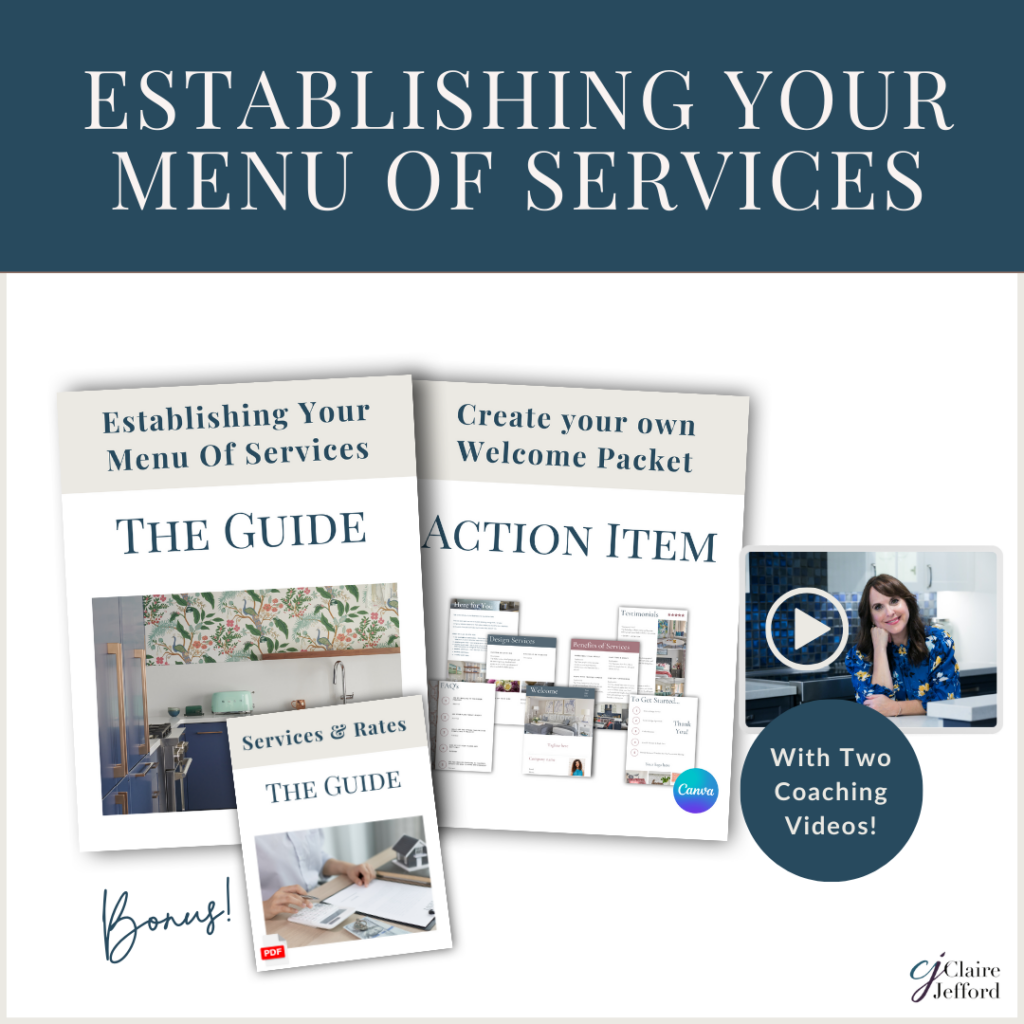
Claire's Guide to Services & Pricing
FREE DOWNLOAD:
Interior Design Services and Rates Guide
This website uses cookies to improve your experience while you navigate through the website. Out of these cookies, the cookies that are categorized as necessary are stored on your browser as they are essential for the working of basic functionalities of the website. We also use third-party cookies that help us analyze and understand how you use this website. These cookies will be stored in your browser only with your consent. You also have the option to opt-out of these cookies. But opting out of some of these cookies may have an effect on your browsing experience.
Necessary cookies are absolutely essential for the website to function properly. This category only includes cookies that ensures basic functionalities and security features of the website. These cookies do not store any personal information.
Any cookies that may not be particularly necessary for the website to function and is used specifically to collect user personal data via analytics, ads, other embedded contents are termed as non-necessary cookies. It is mandatory to procure user consent prior to running these cookies on your website.


 Company:

 Company:
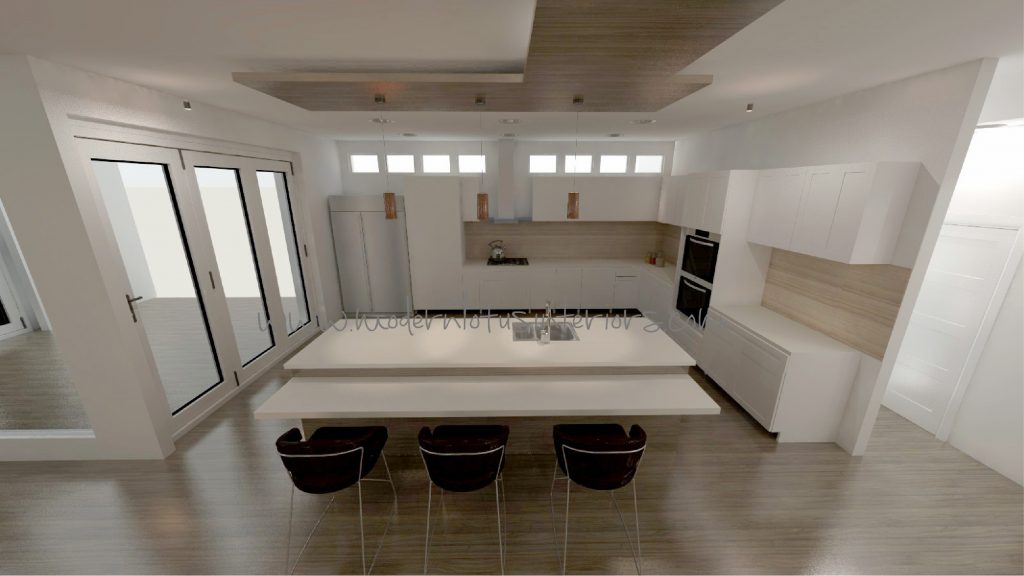
 Company:
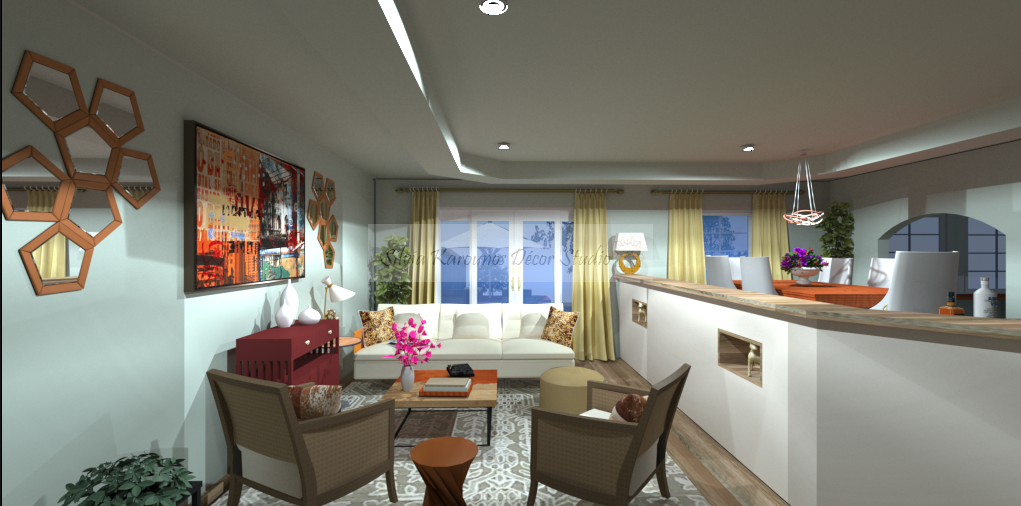
 Company:
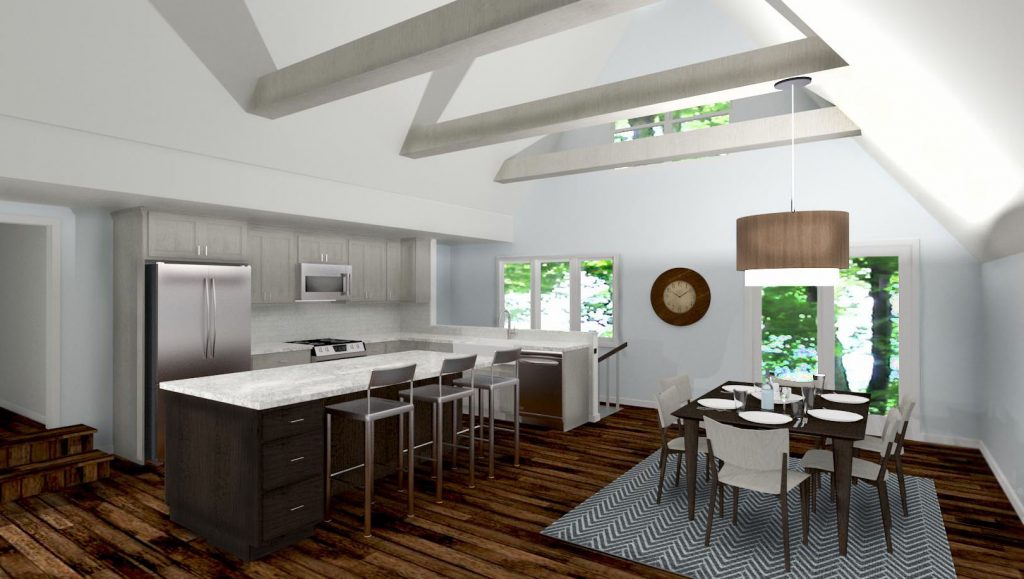
 Company:
 Company: